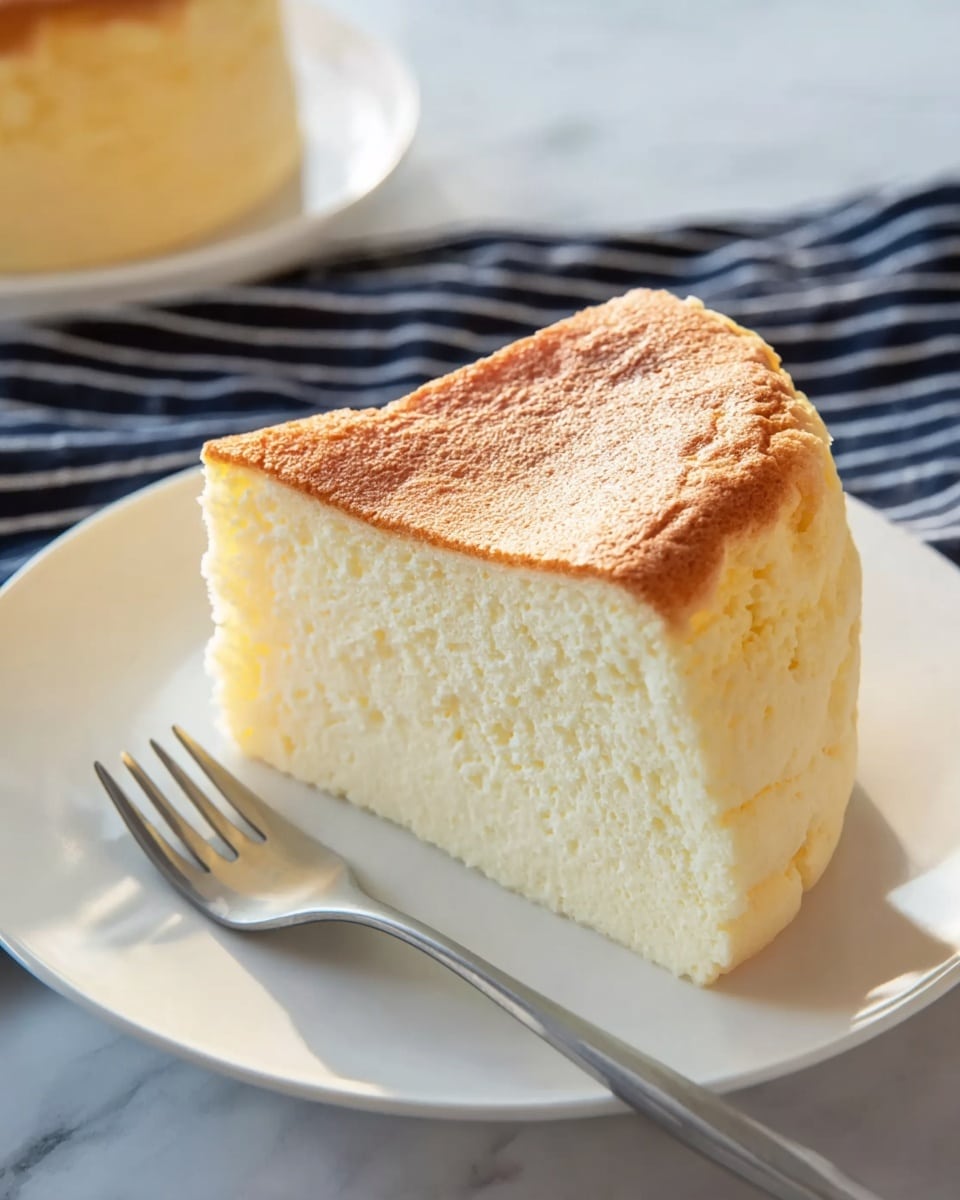
Fácil y Esponjoso Cheesecake Japonés Recipe
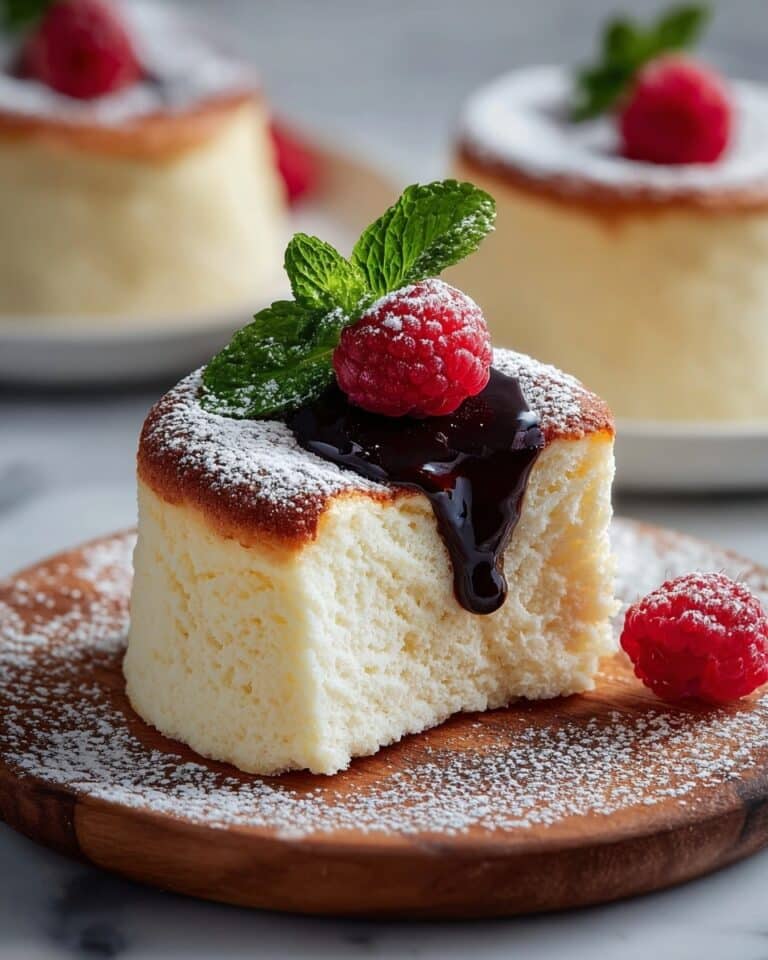
Picture this: the moment you slice into a Fácil y Esponjoso Cheesecake Japonés Recipe, a gentle cloud of sweet vanilla and zesty lemon fills your kitchen, inviting you to indulge. The cake’s delicate, pillowy texture practically melts on your tongue, making each bite feel like a fluffy dream come true. Easy to make yet utterly impressive, this cheesecake is your new secret weapon for delighting family and friends without hours spent in the kitchen.
Why You’ll Love This Fácil y Esponjoso Cheesecake Japonés Recipe
- Ready in about an hour: This recipe fits perfectly into your busy life, delivering a silky, impressive dessert in no time.
- Uses simple ingredients: Basic staples like cream cheese, eggs, and a hint of lemon create magic without complicated shopping lists.
- Perfect for beginners: Step-by-step instructions will guide you effortlessly, so even if you’re new to baking, success is guaranteed.
- Impressive presentation: With its tall, jiggly form and subtle golden top, this cheesecake looks like it came from a fancy patisserie.
- Customizable: Add your personal touch with fruit toppings, citrus zest, or a dusting of powdered sugar for an extra wow factor.
Why This Fácil y Esponjoso Cheesecake Japonés Recipe Works
This cheesecake owes its unique texture and flavor to a few culinary secrets that make all the difference. First, warming the cream cheese, milk, and butter gently over a bain-marie creates a velvety base that blends smoothly with the eggs and flour, avoiding lumps. Next, beating the egg whites to stiff peaks separately and carefully folding them in creates that airy, cloud-like fluff that defines the Japanese style. Finally, baking the cheesecake in a water bath ensures it cooks evenly and maintains its delicate moisture, preventing cracks and dryness. These techniques blend tradition with simple magic to produce one truly especial cheesecake.
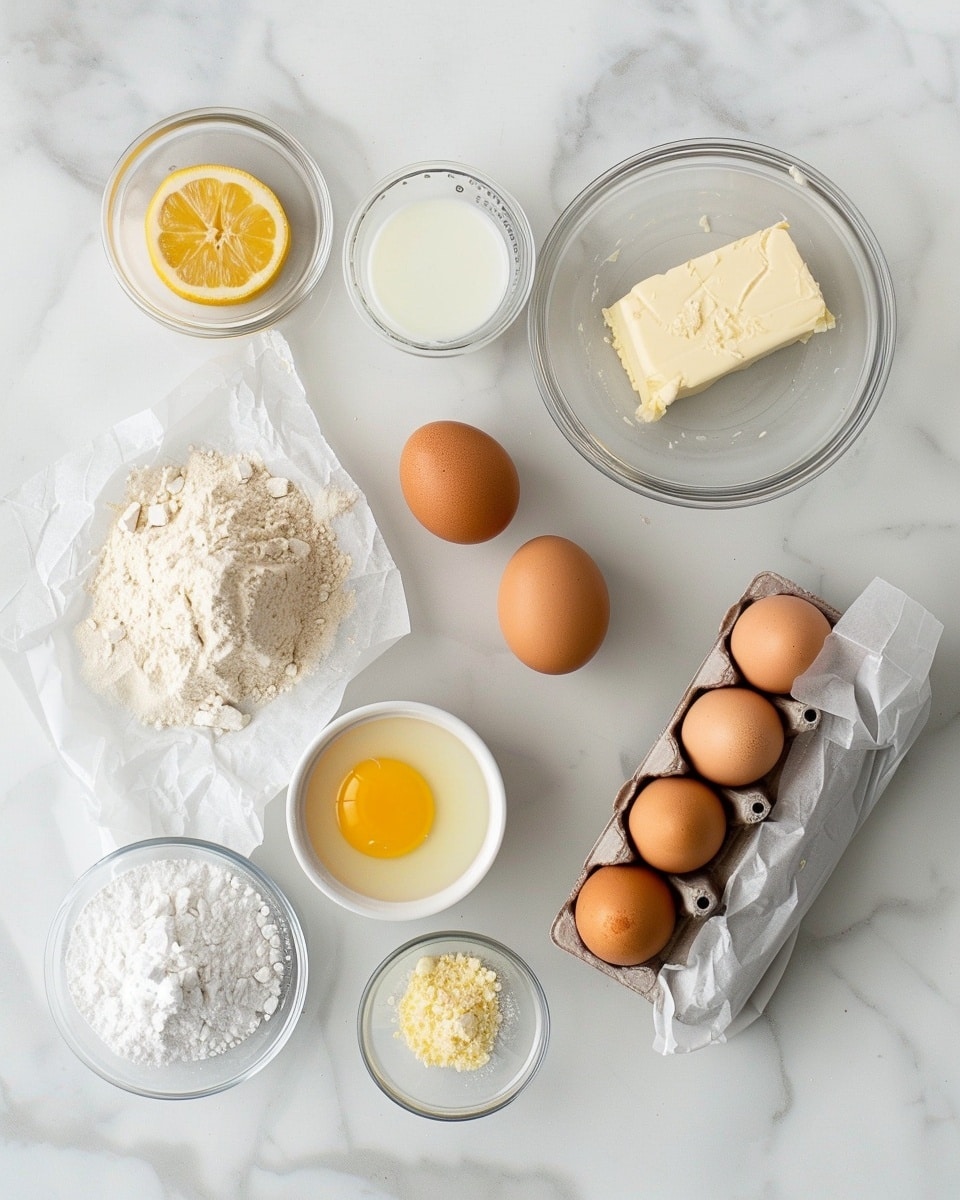
Ingredients You’ll Need
Each ingredient in this Fácil y Esponjoso Cheesecake Japonés Recipe plays a vital role, coming together like a symphony of flavors and textures. Don’t worry — you likely have most of them already!
- Queso crema (cream cheese): The rich, tangy base that gives the cheesecake its signature creamy depth.
- Leche entera (whole milk): Adds moisture and smoothness to the batter.
- Mantequilla (butter): Brings a subtle richness and enhances flavor.
- Huevos (eggs): Provide structure and fluffiness, split into yolks and whites for perfect texture.
- Harina de trigo (all-purpose flour): Stabilizes the batter and helps it hold its shape.
- Maizena (cornstarch): Lightens the texture and gives that melt-in-your-mouth feel.
- Azúcar (sugar): Sweetens delicately without overwhelming.
- Jugo y ralladura de limón (lemon juice and zest): Add a fresh, bright contrast to the creaminess.
- Extracto de vainilla (vanilla extract): Infuses warmth and aromatic sweetness.
- Pizca de sal (pinch of salt): Balances flavors and heightens sweetness.
Ingredient Substitutions & Tips
- Queso crema: Neufchâtel cheese can be used for a lower-fat option or mascarpone for extra creaminess.
- Harina de trigo: Cake flour can substitute for a softer texture, but reduce the amount slightly.
- Maizena: Arrowroot powder works well as a thickener if corn starch is unavailable.
- Leche entera: Full-fat plant-based milk like oat or almond milk can be alternatives for lactose-free needs.
👨🍳 Pro Tips for Perfect Results
- Use room temperature eggs: They whip better and incorporate more air for fluffiness.
- Don’t rush folding in the egg whites: Gentle motions keep that airy texture intact.
- Bake with a water bath: This prevents cracks and ensures even cooking.
- Line your pan well: Use parchment paper or butter and flour generously to avoid sticking.
- Let the cheesecake cool slowly: Cooling inside the oven helps prevent sudden temperature changes that cause sinking.
How to Make Fácil y Esponjoso Cheesecake Japonés Recipe
Step 1: Prepare Your Pan
Start by delicately greasing and flouring a round baking pan. This step is crucial to ensure your cheesecake releases smoothly later on. A loose bottom pan works best for easy removal.
💡 Pro Tip: Line the bottom with parchment paper for extra security against sticking.
Step 2: Sift the Flours
Sift together the all-purpose flour and cornstarch into a bowl, breaking up any lumps so your batter remains silky smooth. This extra step keeps the texture even and light.
💡 Pro Tip: Sifting twice ensures perfect incorporation and fluffiness.
Step 3: Melt the Cream Cheese Mixture
In a heatproof bowl set over simmering water, gently combine the cream cheese, whole milk, and butter. Stir until completely melted and combined into a luscious, creamy blend but don’t let it get too hot.
💡 Pro Tip: Keep heat low and stir continuously to avoid curdling.
Step 4: Whisk Yolks with Flavors
In a separate bowl, vigorously beat the egg yolks with fresh lemon juice, lemon zest, and vanilla extract until slightly thickened and fragrant. This mixture adds brightness that balances the richness perfectly.
💡 Pro Tip: Use fresh lemon zest for the most vibrant flavor burst.
Step 5: Combine Cheese and Flour
Add the sifted flour and cornstarch gradually into the warm cheese mixture, stirring constantly to create a smooth, lump-free batter. This forms the sturdy yet tender base for your cheesecake.
💡 Pro Tip: Mixing slowly prevents clumping and ensures even texture.
Step 6: Blend Yolk Mixture Into Cheese Batter
Allow the cheese mixture to cool slightly before folding the egg yolk mixture in. This step ensures the eggs don’t cook prematurely and keeps the batter silky smooth.
💡 Pro Tip: Incorporate yolks gently to maintain an airy texture.
Step 7: Whip Egg Whites to Stiff Peaks
Beat the egg whites with a pinch of salt until stiff and glossy peaks form. This merengue is the secret to that bounce and fluffiness in your cheesecake.
💡 Pro Tip: Make sure no yolk contaminates the whites for maximum volume.
Step 8: Fold in the Egg Whites
Carefully fold the whipped egg whites into the cake batter in small batches, using a wide spatula and gentle, sweeping motions. This keeps the mixture airy and light.
💡 Pro Tip: Avoid stirring vigorously to retain all the fluffy air bubbles.
Step 9: Bake in a Water Bath
Pour the batter into the prepared pan and place it inside a larger baking dish filled with hot water (about halfway up the sides). Bake at 160°C (320°F) for about one hour until the top is set but still jiggles slightly.
💡 Pro Tip: Cover the top loosely with foil if it browns too quickly.
Step 10: Cool Gradually in the Oven
Turn off the oven and allow your cheesecake to cool slowly inside with the door slightly ajar. This prevents sudden temperature changes that cause cracking or sinking.
💡 Pro Tip: Patience in cooling is key to the perfect texture.
Step 11: Optional Decoration
If you desire, dust your cheesecake with a fine layer of powdered sugar or garnish with fresh berries, making it both beautiful and delicious.
💡 Pro Tip: Use a small sieve for an even sugar coat.
Common Mistakes to Avoid
Learn from these common pitfalls:
- Not separating eggs carefully: Any yolk in the whites can prevent them from whipping properly, losing the cake’s light texture.
- Overmixing the batter: Vigorous stirring deflates air and yields a dense cake.
- Baking without a water bath: Leads to dryness and cracks on the surface.
- Opening the oven door too often: Sudden temperature drops make your cheesecake sink.
- Using cold ingredients: Room temperature components blend more smoothly and whip better.
- Rushing the cooling process: Immediate chilling can cause cracks or cause the cake to collapse.
Delicious Variations to Try
Once you’ve mastered the classic version of the Fácil y Esponjoso Cheesecake Japonés Recipe, why not mix things up with these fantastic twists?
Matcha Green Tea
Add two teaspoons of matcha powder to the batter for an earthy, slightly bitter twist that cuts beautifully through the sweetness.
Berry Swirl
Gently ripple a homemade raspberry or blueberry compote through the batter before baking for a vibrant, fruity surprise inside your cheesecake.
Chocolate Infusion
Fold in melted white or dark chocolate for an irresistible, rich variation that still maintains the airy quality.
Coconut Dream
Substitute half the milk with coconut milk and sprinkle shredded coconut on top for a tropical flair that tastes like a beach vacation.
Lemon Lavender
Infuse the milk with dried culinary lavender buds before mixing to impart a subtle floral aroma that pairs perfectly with the lemon.
How to Serve Fácil y Esponjoso Cheesecake Japonés Recipe
Garnishes
Dust with powdered sugar, add fresh berries, mint leaves, or a drizzle of honey for a visually stunning and tasteful presentation.
Side Dishes
Pair with a scoop of vanilla ice cream, a cup of green tea, or a fresh fruit salad to balance flavors and textures.
Creative Ways to Present
Serve individual mini cheesecakes in ramekins, decorate with edible flowers, or present alongside a berry coulis for an elegant dessert display.
Make Ahead and Storage
Storing Leftovers
Wrap leftover cheesecake tightly in plastic wrap or use an airtight container and keep refrigerated up to 4 days to maintain freshness and texture.
Freezing
For longer storage, freeze the cheesecake covered in foil and plastic wrap for up to 2 months. Thaw overnight in the refrigerator before serving.
Reheating
Enjoy this cheesecake chilled, but if you prefer, warm slices gently in the microwave for 10-15 seconds to bring out a softer texture.
FAQs
Can I use low-fat cream cheese?
While technically possible, low-fat options may result in a less creamy and less fluffy cheesecake. Full-fat cream cheese is recommended for the best texture.
Why do I need to bake in a water bath?
The bain-marie creates gentle, even heat that prevents the cheesecake from cracking and keeps it moist and tender.
What if my cheesecake cracks?
Cracking usually happens from rapid temperature changes or overbaking. Slow cooling and baking in a water bath help prevent this.
Can I make this recipe gluten-free?
Yes! Substitute the all-purpose flour with gluten-free flour blends and ensure your cornstarch brand is gluten-free.
Is it necessary to separate and whip egg whites?
Absolutely! Whipping egg whites adds the signature lightness and fluffiness to the cheesecake.
How do I store leftovers?
Keep wrapped in the refrigerator for up to 4 days or freeze for longer storage.
Can I add fruit to the batter?
Fresh or frozen fruit can be swirled in, but be mindful to not add too much liquid to keep the texture intact.
Why does the cheesecake jiggle after baking?
A slight jiggle is perfect and means the center is creamy and soft—not raw! It will firm up as it cools.
Final Thoughts
This Fácil y Esponjoso Cheesecake Japonés Recipe is an absolute joy—from the moment you mix the batter to the first cloudlike bite. It’s the perfect blend of simple ingredients and special techniques that result in a breathtaking dessert every single time.
Have you tried this Fácil y Esponjoso Cheesecake Japonés Recipe? I’d love to hear how it turned out! Leave a comment below. If you loved this recipe, please share it with friends and family. Happy cooking! 🍰
PrintFácil y Esponjoso Cheesecake Japonés Recipe
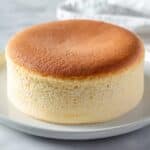
Este famoso cheesecake japonés se caracteriza por su textura suave, esponjosa y ligera, lograda mediante una técnica de horneado a baño María que conserva la humedad y evita que se agriete. Perfecto para quienes disfrutan de un postre delicado y con un sutil sabor cítrico y vainilla.
- Prep Time: 20 minutes
- Cook Time: 1 hour
- Total Time: 1 hour 20 minutes
- Yield: 6 servings 1x
- Category: Dessert
- Method: Baking
- Cuisine: Japanese
Ingredients
Ingredientes principales
- 250 gramos de queso crema
- ½ taza de leche entera de vaca
- 50 gramos de mantequilla
- 6 huevos
- 60 gramos de harina de trigo
- 20 gramos de Maizena (fécula de maíz)
- ¾ taza de azúcar
- ½ limón (jugó y ralladura)
- 1 cucharadita de extracto de vainilla
- 1 pizca de sal
Instructions
- Preparar el molde: Enharina y engrasa un molde redondo para hornear para evitar que el cheesecake se pegue durante la cocción.
- Tamizar ingredientes secos: Tamiza la harina de trigo y la Maizena para asegurarte de que no haya grumos y conseguir una textura más suave.
- Calentar mezcla base: Calienta al baño María el queso crema, la leche y la mantequilla hasta que los ingredientes se integren y suavicen, facilitando así la mezcla final.
- Bate las yemas: Por separado, bate las yemas de huevo junto con el jugo y la ralladura de limón y el extracto de vainilla para incorporar aire y sabor.
- Incorpora la harina a la mezcla de queso: Añade la harina y la Maizena tamizadas a la mezcla caliente de queso, leche y mantequilla y mezcla bien hasta obtener una mezcla homogénea.
- Agregar las yemas: Añade las yemas batidas a la mezcla completamente fría para evitar que se cocinen prematuramente y mezcla suavemente hasta integrar.
- Monta las claras: Bate las claras de huevo con una pizca de sal hasta obtener picos firmes (punto de nieve), lo que le dará aire y ligereza al cheesecake.
- Integrar las claras con la mezcla: Incorpora poco a poco las claras montadas en movimientos envolventes para no perder el aire incorporado y lograr una textura esponjosa.
- Hornear al baño María: Vierte la mezcla en el molde preparado y hornea al baño María durante una hora para cocinar suavemente y mantener la humedad del cheesecake.
- Enfriar en horno: Una vez finalizado el horneado, deja enfriar el cheesecake dentro del horno apagado para evitar cambios bruscos de temperatura que puedan hacer que se baje o agriete.
- Decorar y servir: Si deseas, espolvorea azúcar glass sobre la superficie antes de servir para darle un toque dulce y decorativo.
Notes
- El horneado al baño María es clave para obtener la textura característica de este cheesecake japonés, evitando que se sobrecaliente y se agriete.
- Es importante dejar enfriar el pastel en el horno apagado para prevenir que se baje por cambios bruscos de temperatura.
- Se puede decorar con azúcar glass o frutas frescas al gusto.
- Utilizar ingredientes a temperatura ambiente facilita la mezcla y mejora la textura final.
Keywords: cheesecake japonés, pastel japonés, postre suave, horneado al baño María, cheesecake esponjoso