Easter Egg Thumbprint Cookies Recipe
Picture this: the warm, buttery aroma filling your kitchen, the delightful sight of sugar-dusted cookies shaped like cheerful Easter eggs nestled closely together on a baking sheet. Each bite melts softly with a tender crumb, followed by a sweet crunch from vibrant mini chocolate eggs brightening the center. These Easter Egg Thumbprint Cookies are not just delicious—they are a heartwarming celebration of spring’s joys, easy enough to make with your kids or to impress guests with their festive charm. Get ready for a recipe that’s as fun to bake as it is to share!
Why You’ll Love This Easter Egg Thumbprint Cookies Recipe
- Quick and Easy: Ready in just 30 minutes, perfect for whipping up a batch without any hassle.
- Simple Ingredients: Uses common pantry staples you probably already have on hand, making it budget-friendly and accessible.
- Perfect for Gatherings: Creates 24 delightful servings, ideal for sharing at family celebrations, parties, or springtime treats.
- Impressive Presentation: The colorful mini chocolate eggs nestled in each cookie’s center make for a charming, festive look that will wow guests.
- Customizable: With options to add sprinkles, lemon zest, or coconut nests, you can tailor each batch to your taste or occasion.
Why This Easter Egg Thumbprint Cookies Recipe Works
This Easter Egg Thumbprint Cookies Recipe shines because of a few key details. Creaming the butter and sugar properly ensures the base is light and fluffy, giving the cookies that irresistible melt-in-your-mouth softness. The brief chilling step firms up the dough just enough, so you can roll smooth, perfect balls that bake evenly without spreading too thin. Using a gentle thumbprint indentation after baking creates the perfect pocket for those miniature chocolate eggs to nestle in snugly, adding both flavor contrast and bright visual appeal that makes these cookies so memorable.

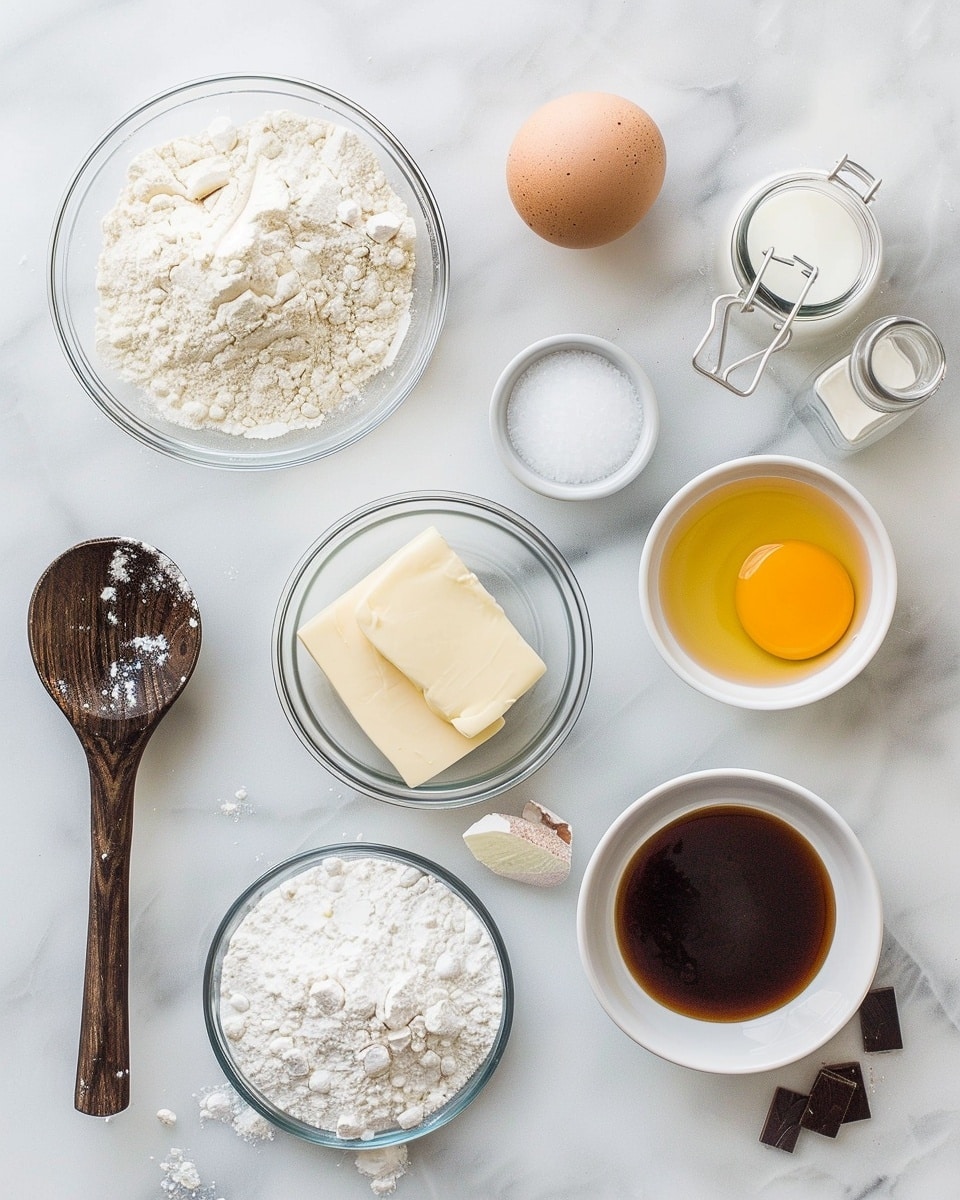
Ingredients You’ll Need
These ingredients are straightforward yet come together beautifully to create a buttery, tender cookie with a splash of classic flavor and delightful texture.
- Unsalted butter: Provides rich, creamy flavor and soft texture.
- Granulated sugar: Sweetens and adds slight crunch when rolled.
- Egg yolk: Adds moisture and tenderness for the perfect crumb.
- Vanilla extract: Brings warmth and depth to the flavor profile.
- Almond extract (optional): Offers a subtle nutty aroma that complements the butter beautifully.
- All-purpose flour: Forms the sturdy but tender structure of the cookie.
- Fine salt: Balances sweetness and enhances all flavors.
- Milk or cream: A splash if needed to bring the dough together.
- Mini chocolate eggs: The star decorative and delicious centerpiece for each thumbprint.
- Optional add-ons: Pastel sprinkles, lemon zest, or shredded coconut for creative garnishing.
Ingredient Substitutions & Tips
- Unsalted butter: You can use salted butter if unsalted is unavailable—simply reduce added salt slightly.
- Granulated sugar: Coconut sugar can provide a lovely caramel note as a substitute.
- Almond extract: If you don’t have almond extract, add a bit more vanilla or a touch of coconut extract for a different twist.
- Mini chocolate eggs: Halal-certified chocolate candies or similarly sized chocolate chips can replace these if preferred.
👨🍳 Pro Tips for Perfect Results
- Cream the butter and sugar thoroughly: Beat them until light and fluffy to introduce air—this makes the cookies tender.
- Chill the dough: Don’t skip this step; it prevents spreading and keeps the cookies thick and soft.
- Press the thumbprint gently: Too deep can cause cookies to crack, just enough to nestle the eggs snugly.
- Use fresh mini chocolate eggs: Older candies may melt more when baked—press them in after baking while the cookies are warm for best results.
- Rolling in sugar adds texture: Don’t forget this step! It creates an appealing sparkle and a slight sugary crunch.
How to Make Easter Egg Thumbprint Cookies Recipe
Step 1: Cream the Butter and Sugar
Start by beating one cup of room temperature unsalted butter with two-thirds cup granulated sugar until the mixture is light, airy, and fluffy—about 2 to 3 minutes. This aeration is the secret to tender, soft cookies that practically melt on your tongue.
💡 Pro Tip: Use a stand mixer or handheld beaters for even creaming, and scrape down the bowl halfway through.
Step 2: Add the Flavor and Yolk
Into this creamy base, mix one egg yolk, one teaspoon vanilla extract, and a quarter teaspoon almond extract (optional but lovely) until everything blends into a smooth, fragrant batter. This step adds richness and depth to the flavor.
💡 Pro Tip: Room temperature egg yolk blends more evenly and keeps the dough silky.
Step 3: Combine Dry Ingredients
In a separate bowl, whisk together two and a quarter cups all-purpose flour with a quarter teaspoon of fine salt. This ensures the salt distributes evenly for balanced flavor in every bite.
💡 Pro Tip: Sifting the flour helps avoid lumps and results in a smoother dough.
Step 4: Form the Dough
Gradually add the dry mixture to the wet ingredients, mixing on low speed just until a soft dough forms. If it feels too crumbly, splash in a teaspoon or two of milk or cream until it holds together gently but is not sticky.
💡 Pro Tip: Avoid overmixing here—stir until combined for tender cookies, not tough ones!
Step 5: Chill Briefly
Wrap the dough in plastic wrap and chill for 20 to 30 minutes. This step is crucial for making sure the dough is firm enough to roll cleanly and hold its shape during baking.
💡 Pro Tip: Chilling also lets the flavors meld, making the cookies even more delicious.
Step 6: Prep to Bake
Preheat your oven to 350°F (175°C). Line baking sheets with parchment paper to prevent sticking. Pour about a quarter cup of sugar into a shallow dish—it’s ready for rolling the cookie dough balls.
💡 Pro Tip: Using parchment paper reduces cleanup and promotes even baking.
Step 7: Shape and Coat
Scoop the dough into tablespoon-sized balls. Roll each ball between your hands until smooth, then coat generously in granulated sugar for a sparkling, lightly crunchy exterior. Place them two inches apart on the baking sheet.
💡 Pro Tip: Keep your hands cool to prevent dough from melting while shaping.
Step 8: Make the Thumbprint
Press gently into the center of each dough ball with your thumb or the back of a teaspoon to form a shallow indentation. This will cradle the mini chocolate eggs after baking.
💡 Pro Tip: Don’t press too hard—the well will become deeper again after baking.
Step 9: Bake
Place the tray in the oven and bake for 10 to 12 minutes. The edges should look set and just begin to turn a pale golden color while the centers remain soft and buttery.
💡 Pro Tip: Watch closely during the last minutes—overbaking dulls the delicate texture.
Step 10: Deepen the Well
Right after removing from the oven, gently press the centers again with the teaspoon measure to deepen the wells. This step ensures there’s enough room for the mini chocolate eggs to nestle perfectly.
💡 Pro Tip: Do this while the cookies are warm but not too hot to avoid breakage.
Step 11: Add the Mini Chocolate Eggs
Press 1 or 2 mini chocolate eggs into the indentation of each still-warm cookie. The warmth helps the candy adhere as the cookies cool and set.
💡 Pro Tip: Use fresh mini eggs for best shape and minimal melting.
Step 12: Cool and Set
Let the cookies cool on the baking sheet for 10 minutes to firm up, then transfer them carefully to a wire rack to cool completely. This resting time lets the cookies develop their full buttery flavor and keeps the chocolate eggs intact.
💡 Pro Tip: Use a thin spatula to avoid cracking the cookies when transferring.
Step 13: Optional Garnish
For an extra festive flourish, drizzle melted white chocolate over the cooled cookies and sprinkle with pastel sprinkles for a cheerful pop of color. Alternatively, roll the edges in toasted shredded coconut to create charming “nest” cookies that add texture and visual interest.
💡 Pro Tip: Allow the drizzle and sprinkles to set before serving or packing.
Common Mistakes to Avoid
Learn from these common pitfalls:
- Skipping chilling: Leads to flat, spread-out cookies that lack buttery softness.
- Pressing thumbprints too deeply before baking: Can cause cracks or overly thin edges.
- Overbaking: Turns tender cookies dry and loses that melt-in-your-mouth quality.
- Using cold butter: Makes creaming difficult and results in dense texture.
- Not rolling dough balls smoothly: Creates rough cookie surfaces that bake unevenly.
- Adding mini eggs before baking: Causes them to melt or lose shape in the oven.
Delicious Variations to Try
Once you’ve mastered the classic Easter Egg Thumbprint Cookies Recipe, feel free to explore these flavorful twists to keep your celebrations exciting!
Lemon Zest & Sprinkles
Add a teaspoon of fresh lemon zest to the dough and top with pastel sprinkles along with the chocolate eggs for a zesty, colorful upgrade perfect for springtime joy.
Coconut Nest Cookies
Roll the dough balls in sugar then lightly press shredded toasted coconut around the edges after baking to mimic a bird’s nest look—extra texture and tropical flavor!
Almond Joy Thumbprints
Mix in chopped toasted almonds to the dough and use halal dark chocolate eggs for a nutty, rich variation that’s equally delightful.
Orange & Cardamom Twist
Replace almond extract with a quarter teaspoon ground cardamom and zest in orange peel for a subtle spice twist that pairs wonderfully with the sweet chocolate eggs.
Berry Jam Center
Swap the mini eggs for a small dollop of halawa or halal berry jam fresh from baking to create a juicy fruit-filled surprise inside each thumbprint.
How to Serve Easter Egg Thumbprint Cookies Recipe
Garnishes
Light dustings of powdered sugar, a drizzle of white or colored chocolate, or a sprinkle of pastel nonpareils elevate these cookies to party-ready elegance.
Side Dishes
Pair these sweet delights with a cup of fragrant herbal tea, fresh fruit salad, or a chilled glass of milk for a perfectly balanced refreshment.
Creative Ways to Present
Arrange the cookies in colorful baskets lined with pastel tissue paper for Easter celebrations, or serve on vintage plates with fresh flowers to create charming afternoon tea vibes.
Make Ahead and Storage
Storing Leftovers
Keep leftover cookies in an airtight container at room temperature for up to 3 days. The buttery texture and crisp sugar exterior stay just right.
Freezing
Freeze the unbaked dough balls on a tray, then transfer to a freezer bag for up to 3 months. Bake straight from frozen, adding a couple of minutes to the baking time.
Reheating
Warm cookies in a 300°F oven for 5 to 7 minutes to refresh their tender softness and slightly melt the chocolates, mimicking fresh-baked magic.
FAQs
Can I use salted butter for this Easter Egg Thumbprint Cookies Recipe?
Yes! Just reduce the added salt slightly to keep the flavor balanced.
What if my dough is too crumbly?
Add a teaspoon of milk or cream and mix gently until it comes together softly.
Can I make these cookies gluten-free?
You can substitute with a gluten-free all-purpose blend—but look for one with xanthan gum included for best texture.
Are these cookies suitable for kids to help make?
Absolutely! The rolling, dipping in sugar, and pressing eggs are fun, simple tasks for little helpers.
How do I prevent the chocolate eggs from melting?
Add them after baking while cookies are warm, not hot—and use fresh, good-quality mini eggs.
Can I use other candies instead of mini chocolate eggs?
Yes, halal-certified similar-sized candies or chocolate chips work well as long as they won’t melt excessively.
Will the cookies keep crispy?
They have a tender, soft center and a slight sugar crunch—stored well, they maintain this texture nicely for a few days.
Can I double the recipe?
Yes! Just be sure to chill the dough in batches for the best shaping and baking performance.
Final Thoughts
These Easter Egg Thumbprint Cookies Recipe embodies joy in both the making and sharing—soft buttery dough, a sweet sparkle of sugar, and colorful chocolate eggs that brighten every bite. Whether you’re celebrating a special holiday or simply craving a cheerful treat, this recipe welcomes you with open arms and delightful flavors.
Have you tried this Easter Egg Thumbprint Cookies Recipe? I’d love to hear how it turned out! Leave a comment below. If you loved this recipe, please share it with friends and family. Happy cooking! 🐣🍪
PrintEaster Egg Thumbprint Cookies Recipe

These Easter Egg Thumbprint Cookies are soft, buttery, and bursting with cheerful springtime charm. Featuring a tender dough with a hint of almond and vanilla, these cookies have a perfect sugar-coated crust and a delightful indentation filled with colorful mini chocolate eggs. Ideal for Easter celebrations, they bring a fun, festive touch to your cookie platter.
- Prep Time: 15 minutes
- Cook Time: 12 minutes
- Total Time: 42 minutes
- Yield: 24 cookies 1x
- Category: Dessert/Cookies
- Method: Baking
- Cuisine: American
Ingredients
Cookie Dough
- 1 cup unsalted butter, room temperature
- 2/3 cup granulated sugar (plus extra 1/4 cup for rolling)
- 1 egg yolk
- 1 teaspoon vanilla extract
- 1/4 teaspoon almond extract (optional but recommended)
- 2 1/4 cups all-purpose flour
- 1/4 teaspoon fine salt
- 1–2 teaspoons milk or cream (optional, if dough feels dry)
Fillings and Garnish
- Mini chocolate eggs (such as Cadbury Mini Eggs), 1-2 per cookie
- Optional: pastel sprinkles
- Optional: lemon zest
- Optional: shredded coconut for “nests”
- Optional: melted white chocolate for drizzling
Instructions
- Cream the butter and sugar: Beat 1 cup unsalted butter with 2/3 cup granulated sugar until the mixture becomes light, fluffy, and pale in color, approximately 2 to 3 minutes using a hand or stand mixer.
- Add flavor and yolk: Mix in 1 egg yolk, 1 teaspoon vanilla extract, and 1/4 teaspoon almond extract until fully incorporated and smooth to infuse flavor into the dough.
- Combine dry ingredients: In a separate bowl, whisk together 2 1/4 cups all-purpose flour and 1/4 teaspoon fine salt to ensure an even distribution of salt and flour.
- Make the dough: Gradually add the dry flour mixture to the butter mixture, mixing on low speed just until the dough forms and is soft. If the dough appears crumbly, add 1 to 2 teaspoons of milk or cream to bring it together.
- Chill briefly: Wrap the dough in plastic wrap and chill it in the refrigerator for 20 to 30 minutes to firm up the dough for easier handling and shaping.
- Prep to bake: Preheat your oven to 350°F (175°C). Line baking sheets with parchment paper. Pour 1/4 cup granulated sugar into a shallow dish for rolling the dough balls.
- Shape and coat: Scoop dough into 1-tablespoon balls, roll them smooth in your hands, then coat them evenly in the granulated sugar. Arrange the cookies about 2 inches apart on the baking sheets.
- Make the well: Press the center of each cookie gently with your thumb or a teaspoon to create a small indentation for the candy eggs.
- Bake: Bake the cookies for 10 to 12 minutes until the edges look set and just begin to turn pale golden, indicating they are done but still soft inside.
- Deepen the well: Immediately after removing the cookies from the oven, gently press the centers again with your thumb or teaspoon to create more space for the eggs, preventing the candy from sinking.
- Add eggs: While the cookies are still warm, press 1 to 2 mini chocolate eggs into the indentation of each cookie so they adhere while the cookie cools.
- Cool and set: Allow the cookies to cool on the baking sheet for 10 minutes to firm up, then transfer them to a wire rack to cool completely.
- Optional garnish: For an extra festive touch, drizzle with melted white chocolate and sprinkle pastel sprinkles on top, or roll the cookie edges in toasted shredded coconut to create a “nest” effect.
Notes
- Ensure butter is softened to room temperature for easy creaming with sugar.
- If dough feels too dry or crumbly, add milk or cream a teaspoon at a time until it holds together.
- Rolling the cookies in sugar before baking adds a delicate crunch and sparkle.
- Pressing the centers once more after baking prevents the mini eggs from sinking as the cookies cool.
- These cookies keep well in an airtight container at room temperature for up to 4 days.
- For added flavor variations, try incorporating lemon zest into the dough or using different flavored extracts.
Keywords: Easter cookies, thumbprint cookies, mini egg cookies, spring cookies, buttery cookies, festive cookies