No-Bake Peanut Butter Bars Recipe
Picture this: the rich, nutty aroma of creamy peanut butter filling your kitchen, paired with the deep, indulgent scent of cocoa. Your hands press down velvet-soft dough into an even layer, knowing that with just a little patience, you’ll soon bite into blissfully soft, fudgy bars that need no oven and practically make themselves. These No-Bake Peanut Butter Bars are the kind of treat that feels like a warm hug on a plate—simple, irresistible, and perfect for moments when you want a homemade dessert without the fuss.
Whether you’re craving a sweet snack or want to impress guests with minimal effort, this recipe makes it effortless to create something truly special. Let me take you on a delicious journey you’ll want to make over and over again!
Why You’ll Love This No-Bake Peanut Butter Bars Recipe
- Quick and Easy: Ready in just 35 minutes, making it perfect for busy days when you crave homemade goodness without spending hours in the kitchen.
- Simple Ingredients: Uses common pantry staples like peanut butter, coconut flour, and cocoa powder that you probably already have on hand.
- Perfect for Any Occasion: Whether it’s a quick snack, a dessert for guests, or a lunchbox surprise, these bars fit right in.
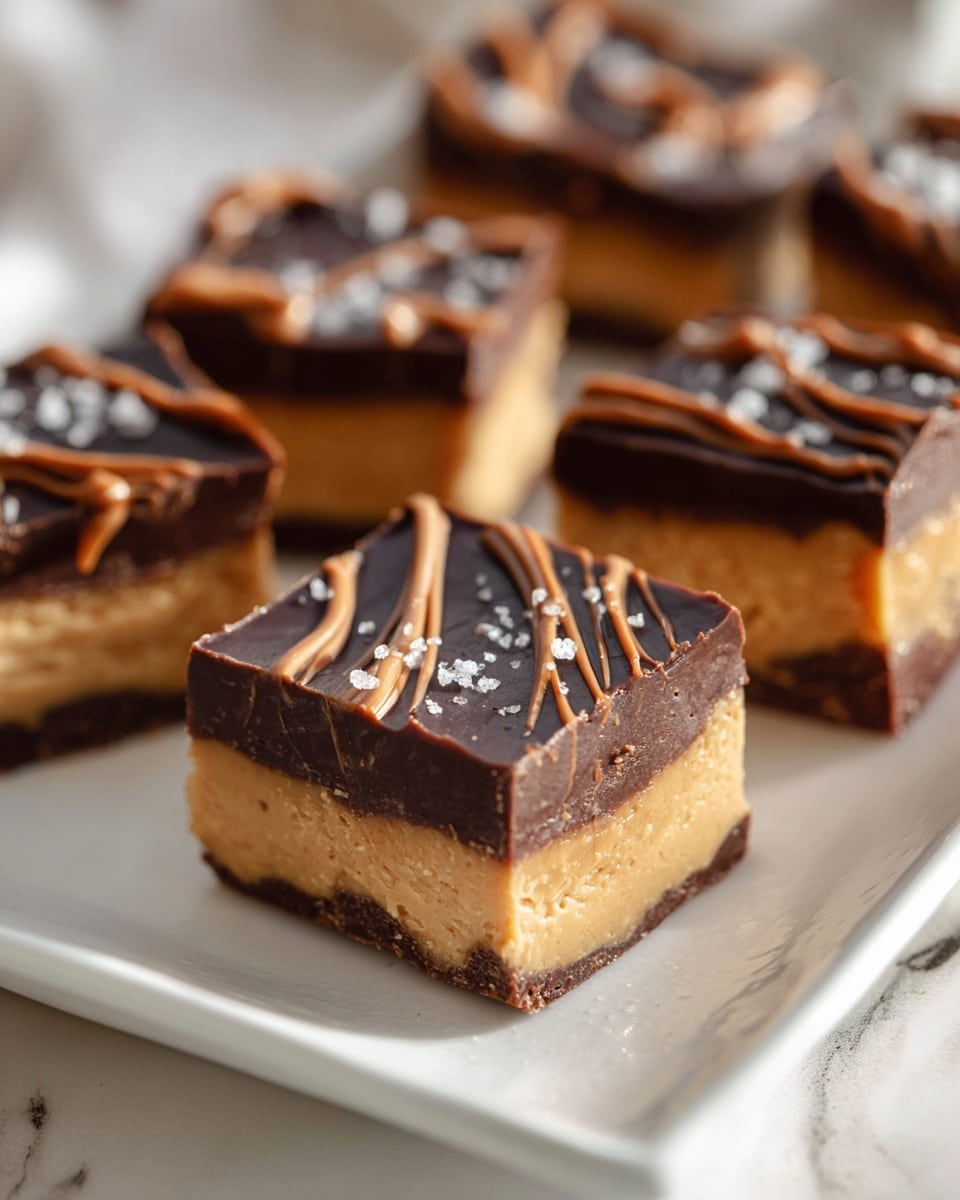
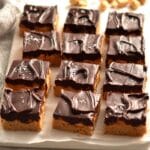
- Impressive Presentation: Silky smooth chocolate topping over a dense peanut buttery base looks sophisticated but with zero stress.
- Customizable: Easily tweak the sweetness or swap ingredients to suit your taste or diet.
Why This No-Bake Peanut Butter Bars Recipe Works
This recipe succeeds by balancing creamy natural peanut butter with the dense texture of coconut flour, creating a dough that holds its shape but stays soft. The addition of coconut oil in the chocolate layer ensures a glossy, smooth topping that sets firmly when chilled. Using powdered sweetener keeps the bars light and prevents graininess, while the cold freezing step locks the layers perfectly, making slicing clean and easy. Each step layers flavor and texture thoughtfully, so every bite melts with peanutty richness and a subtle chocolate kick.
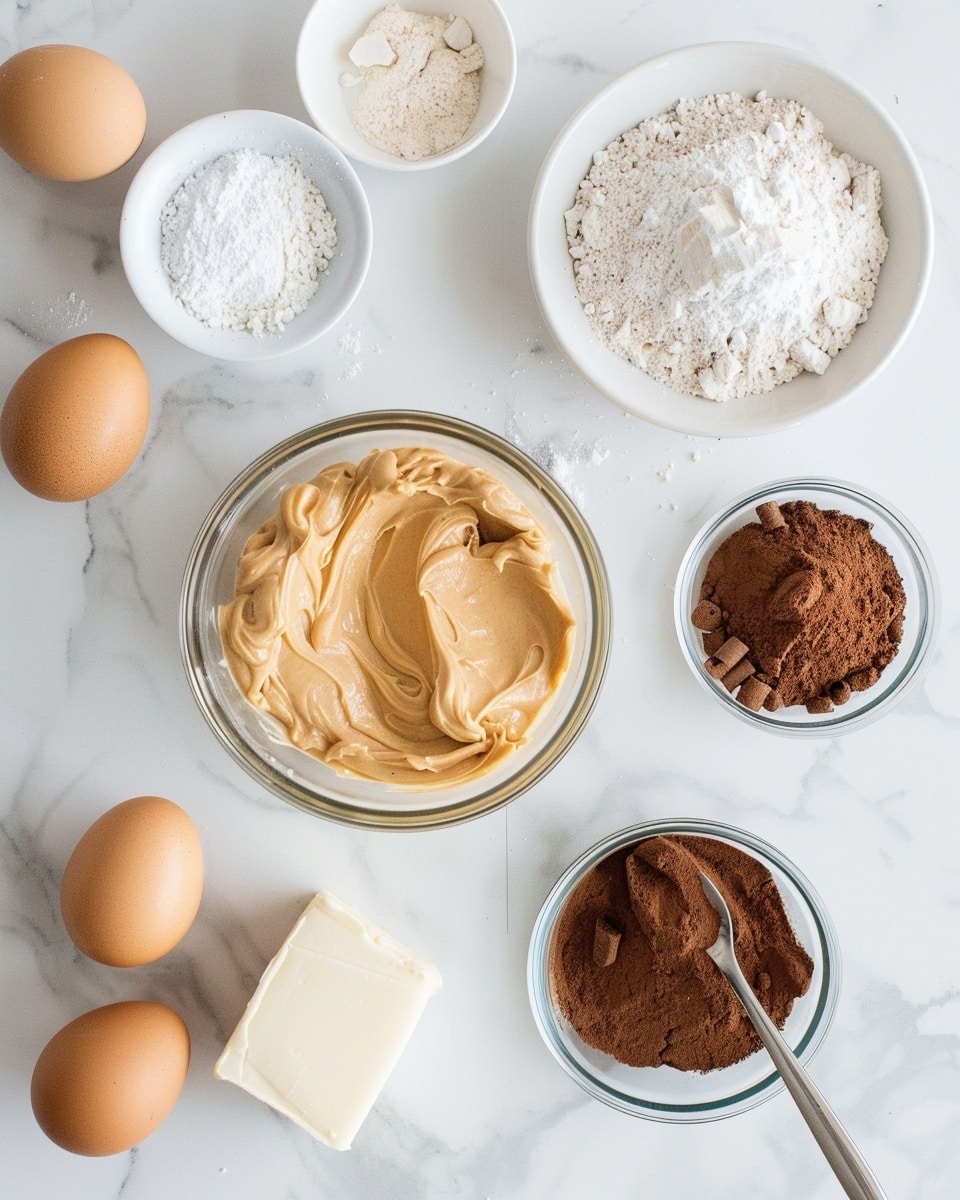
Ingredients You’ll Need
These ingredients are simple yet essential, working together to build the perfect texture and flavor harmony in your No-Bake Peanut Butter Bars.
- Natural Peanut Butter (1 cup plus 2 tablespoons): The creamy, unsalted base that gives the bars their rich, nutty flavor.
- Coconut Flour (2/3 cup): Adds structure and naturally gluten-free bulk to the dough.
- Powdered Sweetener (1/3 cup plus 2 tablespoons): Sweetens the bars without adding sugar graininess; can be erythritol or a preferred liquid sweetener like maple syrup.
- Unsweetened Cocoa Powder (1/3 cup): Brings deep chocolate flavor for the luscious top layer.
- Coconut Oil (4 tablespoons, melted): Enhances softness and shine of the chocolate peanut butter topping.
Ingredient Substitutions & Tips
- Natural Peanut Butter: You can use almond or cashew butter for a different flavor profile, but stick to natural, unsweetened, and oil-free varieties for best results.
- Coconut Flour: Try oat flour if you’re avoiding coconut, but the texture may be slightly different.
- Powdered Sweetener: Swap erythritol for powdered monk fruit or stevia blends, adjusting sweetness to taste. If using liquid sweeteners like maple syrup, reduce other liquids accordingly.
- Coconut Oil: Butter or vegan margarine are alternatives, but coconut oil lends the signature silky set and subtle coconut aroma.
👨🍳 Pro Tips for Perfect Results
- Use natural peanut butter: Avoid brands with added oils or sugars to ensure the best texture and true peanut flavor.
- Chill well: Don’t skip freezing steps—they help the chocolate layer set up beautifully and make slicing smooth.
- Warm your knife before slicing: Run the knife under hot water and dry it to prevent cracking the chocolate top.
- Mix thoroughly: Knead the peanut butter dough well to achieve an even, cohesive texture without lumps.
- Adjust sweetness: Taste your sweetener choice beforehand to balance the bars perfectly for your palate.
How to Make No-Bake Peanut Butter Bars Recipe
Step 1: Prepare the Peanut Butter Dough
In a medium mixing bowl, combine 1 cup of natural peanut butter, 2/3 cup coconut flour, and 1/3 cup powdered sweetener. Use a spatula to stir everything until roughly mixed, then get in there with your hands and knead the mixture until you have a smooth, consistent dough that holds together well.
💡 Pro Tip: Use your hands here—it helps you feel when the dough is just right, not too dry or sticky.
Step 2: Shape the Base Layer
Line a 9×5-inch loaf pan with parchment paper. Transfer the peanut butter dough into the pan and press it down steadily to cover the bottom evenly. Smooth the top with a spatula to create a flat, firm base.
💡 Pro Tip: Press firmly but gently to avoid cracks, creating a sturdy base for your chocolate layer.
Step 3: Chill the Base Layer
Place the loaf pan in the freezer while you prepare the chocolate topping. This chilling step makes all the difference in setting your bars perfectly.
💡 Pro Tip: Don’t rush this—freezing gives the peanut dough the perfect texture for layering.
Step 4: Make the Chocolate Peanut Butter Topping
In a small bowl, combine 2 tablespoons natural peanut butter and 4 tablespoons melted coconut oil. Warm gently either in the microwave for 30 seconds or on the stove over low heat, stirring until smooth and fully combined.
💡 Pro Tip: Stir quickly when adding 2 tablespoons powdered sweetener and 1/3 cup unsweetened cocoa powder to avoid lumps; add powders gradually.
Step 5: Add the Chocolate Layer
Take the loaf pan out of the freezer and immediately spread the chocolate mixture evenly over the firm peanut butter base using a spatula. Because the base is cold, this layer sets rapidly, creating that classic two-tone look.
💡 Pro Tip: Work swiftly so the topping is smooth and glossy before it sets.
Step 6: Final Freeze and Slice
Return the whole pan to the freezer for at least 30 minutes to allow both layers to firm up completely. When ready, warm your knife under hot water and dry it before slicing into 12 bars to prevent cracking the chocolate layer.
💡 Pro Tip: Pre-warming the knife is key to clean, professional-looking squares.
Common Mistakes to Avoid
Learn from these common pitfalls:
- Using crunchy peanut butter: It can make the dough gritty and difficult to press evenly.
- Skipping the freezing steps: Without chilling, the bars won’t set properly and might crumble.
- Not warming the chocolate layer ingredients enough: This can cause lumps and uneven mixing.
- Adding too much flour: Coconut flour is very absorbent; adding more can dry out your dough.
- Cutting bars while still warm: This can cause the chocolate layer to crack or stick to the knife.
- Using sweeteners not suitable for baking: Avoid granulated sweeteners that don’t dissolve well; stick to powdered or liquid alternatives.
Delicious Variations to Try
Once you’ve mastered the classic No-Bake Peanut Butter Bars Recipe, why not experiment with these delightful twists?
Almond Butter Bliss
Swap peanut butter for natural almond butter for a subtle, sweet nuttiness that complements the cocoa topping beautifully.
Coconut Crunch
Add 1/4 cup unsweetened shredded coconut to the base dough before pressing it into the pan for an extra tropical twist and lovely texture.
Chocolate Chip Surprise
Fold in a handful of mini dark chocolate chips into the peanut butter base for bursts of melted chocolate in every bite.
Maple Sweetened Classic
Use pure maple syrup instead of powdered sweetener to add a warm, complex sweetness that’s naturally delicious and halal-friendly.
Super Seed Boost
Mix in chia or flax seeds into the base to sneak some extra nutrition while keeping that creamy smoothness.
How to Serve No-Bake Peanut Butter Bars Recipe
Garnishes
A light dusting of cocoa powder or chopped roasted peanuts on top adds elegance and texture. For a festive touch, sprinkle a pinch of flaky sea salt to enhance the flavors.
Side Dishes
Serve these bars alongside a cup of herbal tea or creamy latte for a perfect mid-afternoon treat or casual dessert at brunch.
Creative Ways to Present
Wrap individual bars in colorful parchment or place them on a tiered dessert stand for parties. You can also layer them in clear glass jars with whipped cream or yogurt for a fancy layered dessert vibe.
Make Ahead and Storage
Storing Leftovers
Keep the bars in an airtight container in the fridge where they stay perfectly soft yet firm for up to 4 weeks. This makes them a fantastic make-ahead snack or dessert.
Freezing
Wrap bars individually in plastic wrap and place them in a freezer-safe container to freeze for up to 3 months. They’re just as delicious eaten frozen—like a peanut butter ice pop!
Reheating
If you prefer a softer bar, let frozen bars thaw at room temperature for 30 minutes to 1 hour before enjoying, or pop them in the microwave for 10-15 seconds.
FAQs
Can I use crunchy peanut butter?
Crunched peanut butter will change the texture and may make the bars gritty. Smooth natural peanut butter works best for that creamy, uniform base.
What if I don’t have coconut flour?
You can substitute oat flour or almond flour, but the texture might be slightly different. Start with equal amounts and adjust as needed.
Is this recipe gluten-free?
Yes! Using coconut flour and natural peanut butter ensures the bars are naturally gluten-free.
Can I use sugar instead of powdered sweetener?
You can, but powdered sweeteners like erythritol or monk fruit blends create a smoother texture without grittiness.
How long do these bars last?
Stored in the refrigerator, they stay fresh up to 4 weeks and freeze well for months.
Can I make these bars nut-free?
Try sunflower seed butter as a peanut butter alternative, but texture and flavor will vary.
Why does the chocolate layer sometimes crack?
Cutting without warming the knife or slicing bars before fully frozen causes cracking. Warm your knife and freeze fully before slicing.
Can I add protein powder to this recipe?
Yes, you can add one or two tablespoons to the base dough, but you may need to adjust the flour quantity to maintain texture.
Final Thoughts
These No-Bake Peanut Butter Bars Recipe are like the cozy friend you didn’t know you needed—comforting, effortless, and endlessly satisfying. The marriage of peanut butter’s rich creaminess with smooth, chocolatey goodness, all coming together without turning on the oven, feels almost magical. Whether you’re sneaking a late-night snack or prepping treats for guests, these bars will win hearts every time.
Have you tried this No-Bake Peanut Butter Bars Recipe? I’d love to hear how it turned out! Leave a comment below. If you loved this recipe, please share it with friends and family. Happy cooking! 😊
PrintNo-Bake Peanut Butter Bars Recipe
Delicious and easy No-Bake Peanut Butter Bars made with natural peanut butter, coconut flour, and a rich chocolate peanut butter topping. These bars require no baking and are perfect for a quick, healthy, and satisfying snack or dessert. They combine creamy peanut butter flavor with a smooth chocolate layer and a hint of sweetness, all while being gluten-free, low sugar, and suitable for a low-carb lifestyle.
- Prep Time: 10 minutes
- Cook Time: 0 minutes
- Total Time: 35 minutes
- Yield: 12 servings 1x
- Category: Dessert
- Method: No-Cook
- Cuisine: American
- Diet: Gluten Free
Ingredients
Base Layer
- 1 cup Natural Peanut Butter (unsalted, no oil added)
- 2/3 cup Coconut Flour
- 1/3 cup Powdered Sweetener of Choice (such as powdered erythritol or liquid sweetener like maple syrup)
Chocolate Peanut Butter Layer
- 2 tablespoons Natural Peanut Butter (unsalted, no added oil or sugar)
- 4 tablespoons Coconut Oil (melted)
- 2 tablespoons Powdered Sweetener of Choice
- 1/3 cup Unsweetened Cocoa Powder
Instructions
- Mix Base Ingredients: In a medium mixing bowl, add 1 cup natural peanut butter, 2/3 cup coconut flour, and 1/3 cup powdered sweetener. Combine with a spatula, then knead with your hand to form a consistent peanut butter dough that holds together well.
- Form Base Layer: Transfer the peanut butter dough into a rectangle loaf baking pan lined with parchment paper (about 9×5 inch size). Press the dough evenly to cover the bottom of the pan and smooth the top with a spatula to create an even base.
- Freeze Base: Place the pan in the freezer while you prepare the chocolate peanut butter layer. This helps the base set firmly and quickens the setting of the next layer.
- Prepare Chocolate Layer: In a small bowl, combine 2 tablespoons natural peanut butter and 4 tablespoons melted coconut oil. Warm the mixture in the microwave for 30 seconds or on the stove over low heat for about 1 minute, stirring constantly to blend smoothly.
- Add Sweetener and Cocoa: Stir in 2 tablespoons powdered sweetener and 1/3 cup unsweetened cocoa powder into the warm peanut butter and coconut oil mixture. Stir quickly to avoid lumps, or add powdered ingredients gradually, stirring thoroughly after each addition.
- Spread Chocolate Layer: Remove the pan from the freezer. Quickly spread the chocolate peanut butter mixture evenly over the peanut butter base using a spatula. The cold base will help the chocolate layer set rapidly.
- Freeze Bars: Return the pan to the freezer for 30 minutes to allow both layers to firm up and set completely.
- Slice and Serve: Once set, warm your knife blade under hot water and dry it before slicing the bars into 12 equal pieces. Warming the knife prevents the chocolate layer from cracking or breaking.
- Storage Instructions: Store the bars in an airtight container in the refrigerator. They remain soft and fresh for up to 4 weeks. You can also freeze the bars and eat them frozen or defrost them for 30 minutes to 1 hour before consumption for a softer texture.
Notes
- Using natural, unsalted peanut butter with no added oils ensures the best texture and flavor.
- Coconut flour absorbs moisture quickly; be sure to knead dough thoroughly for a good consistency.
- Warm the chocolate layer ingredients gently to avoid overheating or burning the peanut butter.
- Powdered sweeteners like erythritol or alternatives such as maple syrup can be used, but consistency may vary slightly.
- Warming the knife before slicing helps maintain clean cuts and prevents cracking of the chocolate top layer.
- Keep the bars well refrigerated or frozen to preserve texture and freshness.
Keywords: no bake peanut butter bars, low carb peanut butter bars, gluten free dessert, easy no bake recipe, keto peanut butter bars, healthy peanut butter bars