Danish Chocolate Dipped Biscuits Recipe
Picture this: the comforting aroma of sweet, buttery biscuits mingling with the rich, velvety scent of melted chocolate wafting through your kitchen. As you bite into one of these Danish Chocolate Dipped Biscuits, your taste buds dance with delight at the perfect harmony of crisp edges giving way to a tender, melt-in-your-mouth center, all beautifully coated in luscious chocolate. This recipe is a delightful treat that’s not only a breeze to prepare but also guaranteed to impress your guests or satisfy that mid-afternoon craving. Let me take you through this charming, scrumptious journey!
Why You’ll Love This Danish Chocolate Dipped Biscuits Recipe
- Quick and Easy: Ready in just 27 minutes, these biscuits come together faster than you can say “chocolate!”
- Simple Ingredients: Uses common pantry staples you probably already have on hand, keeping things fuss-free and wallet-friendly.
- Perfect for Sharing: Makes 24 delicious biscuits, ideal for gatherings, gift baskets, or sharing with family and friends.
- Impressive Presentation: The half-dipped chocolate finish looks stunning and adds a sophisticated touch without extra effort.
- Customizable: You can easily tweak the recipe by swapping semi-sweet chocolate for dark or white chocolate, or add nuts and spices to suit your cravings.
Why This Danish Chocolate Dipped Biscuits Recipe Works
This Danish Chocolate Dipped Biscuits Recipe strikes the perfect balance between a tender crumb and crisp edges because of a few key factors. First, creaming the butter and sugars until light and fluffy introduces tiny air pockets, leading to a delicate texture. Next, the addition of baking powder gives the biscuits a gentle rise for a melt-in-your-mouth bite. Finally, dipping the biscuits halfway into silky melted chocolate not only amps up the flavor but adds a textural contrast that makes every bite utterly unforgettable. These intentional techniques are what make this recipe a timeless winner.

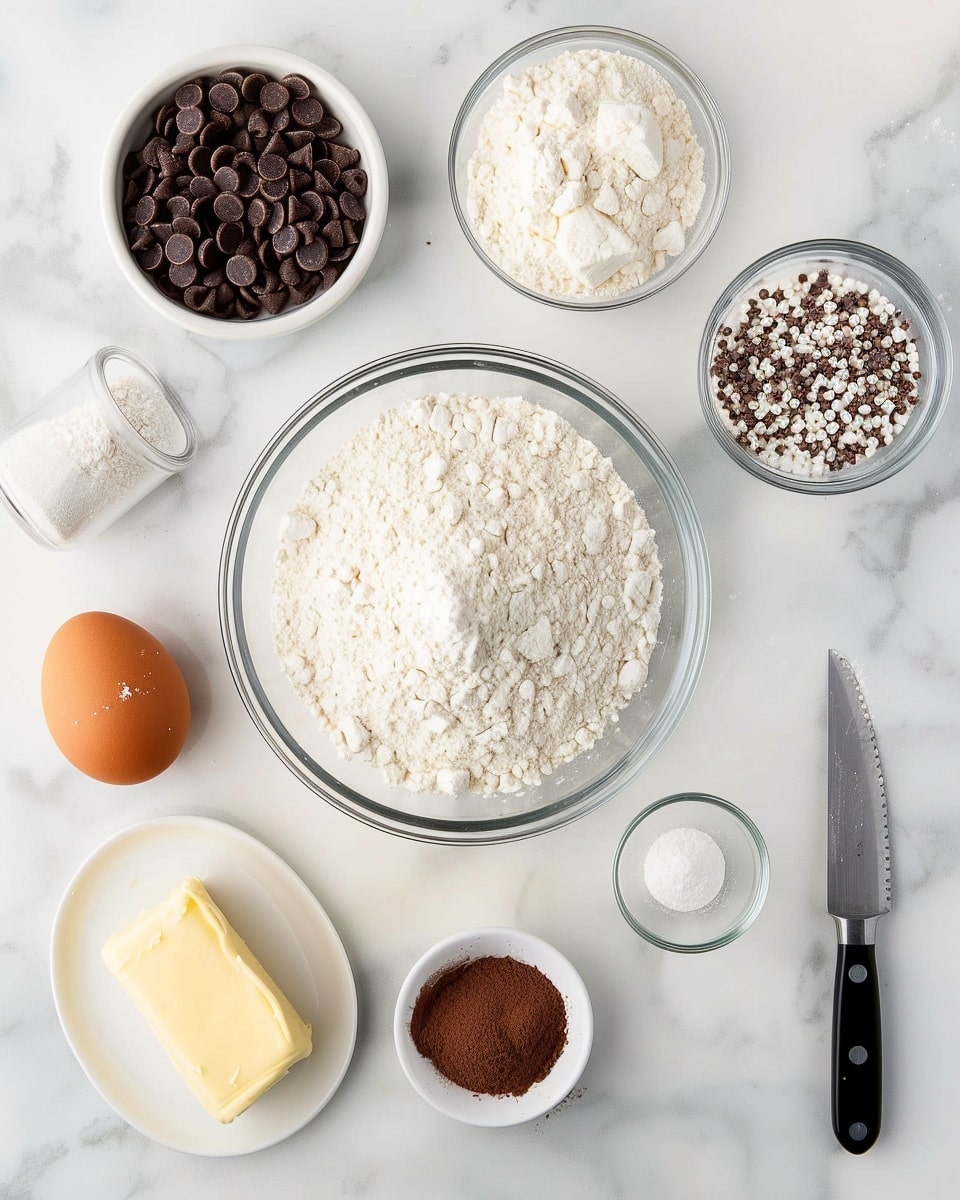
Ingredients You’ll Need
The beauty of this recipe lies in its simplicity. Each ingredient plays a vital role in building the perfect biscuit, from the soft butter to the luscious chocolate coating.
- All-purpose flour: Provides the structure and tenderness for the biscuits.
- Unsalted butter: Adds richness and moisture, making the biscuits soft and flavorful.
- Granulated sugar: Sweetens and contributes to the delicate crispness.
- Brown sugar: Adds a hint of molasses flavor for depth and chewiness.
- Large egg: Binds the ingredients and adds richness.
- Baking powder: Gives a gentle lift for a tender crumb.
- Semi-sweet chocolate chips or melting chocolate: Melts smoothly for dipping and adds that irresistible chocolatey finish.
Ingredient Substitutions & Tips
- Unsalted butter: You can use salted butter but reduce or omit additional salt in the recipe.
- Granulated sugar: Coconut sugar or cane sugar can be used as natural alternatives but expect a slight flavor difference.
- Semi-sweet chocolate chips: Swap for dark chocolate for a richer taste or white chocolate for a sweeter twist.
- All-purpose flour: For a gluten-free option, try a 1:1 gluten-free baking flour blend, ensuring it contains xanthan gum.
👨🍳 Pro Tips for Perfect Results
- Use room temperature butter: It creams better with sugar for a lighter dough.
- Sift your flour and baking powder: This avoids lumps and ensures even distribution for uniform texture.
- Don’t overmix: Combine ingredients just until incorporated to keep biscuits tender.
- Use parchment paper: Prevents sticking and ensures even baking without burnt bottoms.
- Allow chocolate to set at room temperature: Refrigeration can cause the chocolate to bloom and lose shine.
How to Make Danish Chocolate Dipped Biscuits Recipe
Step 1: Prep Your Oven and Baking Sheets
Start by preheating your oven to 350°F (175°C). Line two baking sheets with parchment paper to create a non-stick surface that also makes cleanup a breeze. This simple step sets the stage for perfectly baked biscuits that won’t stick or burn.
💡 Pro Tip: Use fresh parchment paper for each batch to maintain consistent baking results.
Step 2: Cream Butter and Sugars
In a large mixing bowl, beat the softened unsalted butter with granulated sugar and brown sugar until the mixture turns light and fluffy. This takes about 3 to 4 minutes with an electric mixer. It’s this airy texture that lends the biscuits their delicate crumb and slight chewiness.
💡 Pro Tip: Make sure your butter is truly softened, but not melted, for the best creaming results.
Step 3: Add the Egg
Crack in the large egg and continue mixing until it’s fully combined. The egg helps bind all the ingredients and adds a luscious richness to the dough.
💡 Pro Tip: Beat the egg lightly before adding if you want an even smoother mixture.
Step 4: Incorporate Dry Ingredients
Sift the all-purpose flour and baking powder together to eliminate lumps and ensure even leavening. Gradually mix this dry blend into the wet ingredients, combining just until fully incorporated. Avoid overmixing, which can develop gluten and toughen the biscuits.
💡 Pro Tip: Use a spatula or wooden spoon for gentle folding to protect that tender texture.
Step 5: Shape and Bake
Scoop tablespoon-sized dollops of dough onto your lined baking sheets, spacing them about two inches apart to allow room for spreading. Lightly flatten each mound with the back of a spoon or your fingers. Bake for 10 to 12 minutes, watching for golden edges that signal they’re perfectly cooked.
💡 Pro Tip: Rotate the pans halfway through baking to ensure even cooking.
Step 6: Cool and Dip in Chocolate
Once baked, let the biscuits cool on the baking sheets for five minutes before transferring to wire racks to cool completely. Meanwhile, melt your semi-sweet chocolate chips in a microwave-safe bowl in short bursts, stirring between intervals until smooth. Dip half of each biscuit into the warm chocolate and set them back on parchment paper to let that glossy coat harden.
💡 Pro Tip: Use high-quality chocolate for a smoother melt and richer flavor.
Common Mistakes to Avoid
Learn from these common pitfalls:
- Using melted butter: This leads to greasy dough and flat, tough biscuits rather than tender ones.
- Skipping the parchment paper: Causes sticking and uneven baking, making it hard to remove biscuits without breakage.
- Overmixing the dough: Activates gluten, resulting in dense, hard biscuits instead of soft, crumbly ones.
- Not spacing dough properly: Causes biscuits to spread into each other and bake unevenly.
- Dipping warm biscuits into chocolate: Makes the chocolate slip off; always dip after biscuits cool but chocolate is warm and fluid.
- Microwaving chocolate too long: Can seize or burn the chocolate, resulting in a gritty texture.
Delicious Variations to Try
Once you’ve mastered the classic Danish Chocolate Dipped Biscuits Recipe, you can take your baking adventure further with these delightful twists:
Almond Crunch Dipped Biscuits
Sprinkle chopped toasted almonds onto the wet chocolate dip before it sets for a satisfying crunch with every bite.
Orange Zest Infused
Add a teaspoon of finely grated orange zest to the dough to infuse a fragrant citrus note that pairs beautifully with the chocolate.
Cinnamon Swirl Biscuits
Mix in half a teaspoon of cinnamon into your dry ingredients to add warm, spicy undertones that cozy up this treat.
White Chocolate Twist
Swap semi-sweet chocolate for creamy white chocolate and consider adding a handful of dried cranberries or pistachios for contrast.
Sea Salt Sprinkle
After dipping in chocolate, lightly sprinkle the biscuits with flaky sea salt to elevate the chocolate’s sweetness with a salty-sweet balance.
How to Serve Danish Chocolate Dipped Biscuits Recipe
Garnishes
Enhance your biscuits with a dusting of powdered sugar, a drizzle of extra melted chocolate, or a light sprinkle of colorful sprinkles for festive occasions.
Side Dishes
These biscuits pair beautifully with a hot cup of coffee, fragrant tea, or a cold glass of milk. They also make an elegant companion to fresh fruit platters or creamy mascarpone mousse for dessert spreads.
Creative Ways to Present
Arrange them in a tiered serving tray for a charming display, or wrap them in parchment with ribbon as lovely homemade gifts. For parties, present them alongside small bowls of dipping sauces like caramel or raspberry coulis for added indulgence.
Make Ahead and Storage
Storing Leftovers
Keep your Danish Chocolate Dipped Biscuits in an airtight container at room temperature for up to 3 days. Place parchment layers between biscuits to stop sticking and preserve their crisp edges.
Freezing
You can freeze baked and cooled biscuits in airtight containers for up to 1 month. For chocolate-dipped ones, freeze without the chocolate coating and dip them fresh after thawing for best texture.
Reheating
Warm biscuits briefly in a low oven (about 300°F/150°C) for 5 minutes to revive softness. Avoid microwaving chocolate dipped biscuits as it can melt the coating unevenly.
FAQs
Can I use salted butter instead of unsalted?
Yes, but reduce or omit any additional salt in the recipe since salted butter adds extra saltiness.
What type of chocolate works best for dipping?
Semi-sweet or bittersweet chocolate chips work wonderfully because they melt smoothly without being overly sweet, balancing the biscuit’s flavors perfectly.
Can I make these biscuits gluten-free?
Absolutely! Use a 1:1 gluten-free baking flour blend containing xanthan gum to maintain the right texture.
How should I store these biscuits?
Store them in an airtight container at room temperature for up to three days. For longer storage, freeze the plain biscuits and dip in chocolate after thawing.
Is it necessary to sift the flour and baking powder?
While not absolutely required, sifting ensures they mix evenly, prevents lumps, and helps maintain a light, tender biscuit.
Can I make the dough ahead of time?
Yes, you can prepare the dough and refrigerate it for up to 24 hours before baking. Just bring it back to room temperature before scooping.
What is the best way to melt chocolate for dipping?
The microwave method with short bursts while stirring is quick and efficient. Alternatively, use a double boiler for gentle melting.
Can I add nuts or dried fruit to the biscuits?
Definitely! Chopped nuts or dried fruit can be folded into the dough for added texture and flavor, just keep portions reasonable to keep the biscuit structure intact.
Final Thoughts
There’s nothing quite like the joy of biting into your own homemade Danish Chocolate Dipped Biscuits—the crisp edges, tender crumb, and that heavenly chocolate finish all come together to create a truly special treat. Whether you’re after a quick sweet snack or a charming gift for loved ones, this recipe delivers beautiful results with minimal fuss. Embrace the warmth and comfort this recipe brings and make it a beloved staple in your baking repertoire.
Have you tried this Danish Chocolate Dipped Biscuits Recipe? I’d love to hear how it turned out! Leave a comment below. If you loved this recipe, please share it with friends and family. Happy cooking! 🍪🍫
PrintDanish Chocolate Dipped Biscuits Recipe

Delight in these Danish Chocolate Dipped Biscuits, a perfect blend of buttery, soft cookies with a rich semi-sweet chocolate coating. These biscuits are easy to make and ideal for sharing, offering a delightful treat with every bite.
- Prep Time: 10 minutes
- Cook Time: 12 minutes
- Total Time: 27 minutes
- Yield: 24 servings 1x
- Category: Dessert
- Method: Baking
- Cuisine: Danish
Ingredients
Dry Ingredients
- 2 cups all-purpose flour
- 1 tsp baking powder
Wet Ingredients
- 1/2 cup unsalted butter, softened
- 1/2 cup granulated sugar
- 1/4 cup brown sugar
- 1 large egg
Chocolate Coating
- 1 cup semi-sweet chocolate chips or melting chocolate
Instructions
- Preheat the oven: Preheat your oven to 350°F (175°C) and line two baking sheets with parchment paper to ensure the biscuits bake evenly and don’t stick.
- Cream butter and sugars: In a large bowl, cream together the softened butter, granulated sugar, and brown sugar until the mixture is light and fluffy. Then beat in the egg until the mixture is well combined to create a smooth batter.
- Mix dry ingredients: Sift together the all-purpose flour and baking powder, ensuring even distribution of the leavening agent, then gradually incorporate this dry mixture into the wet ingredients until fully combined without overmixing.
- Scoop and shape dough: Using a tablespoon, scoop portions of dough onto the prepared baking sheets, spacing each about two inches apart to allow for spreading. Flatten each dough scoop slightly to create an even thickness.
- Bake the biscuits: Bake in the preheated oven for 10-12 minutes until the edges turn golden brown. Remove from oven and allow biscuits to cool on the baking sheet for five minutes before transferring them to wire racks to cool completely.
- Melt chocolate and dip biscuits: Melt the semi-sweet chocolate chips in a microwave-safe bowl, using short bursts of heat to avoid burning, and stir until smooth. Once biscuits are cool, dip half of each biscuit into the melted chocolate and place them back on parchment paper to set the chocolate coating.
Notes
- For best results, ensure butter is softened but not melted to create the perfect biscuit texture.
- Sifting the flour and baking powder helps to avoid lumps and ensures even mixing.
- If semi-sweet chocolate is unavailable, bittersweet or milk chocolate can be used depending on your sweetness preference.
- Allow the chocolate coating to fully set at room temperature or refrigerate briefly to speed up the process.
- Store the biscuits in an airtight container for up to one week to maintain freshness.
Keywords: Danish biscuits, chocolate dipped cookies, homemade biscuits, semi-sweet chocolate, easy dessert recipe