Harry Potter Butterbeer Lush Recipe
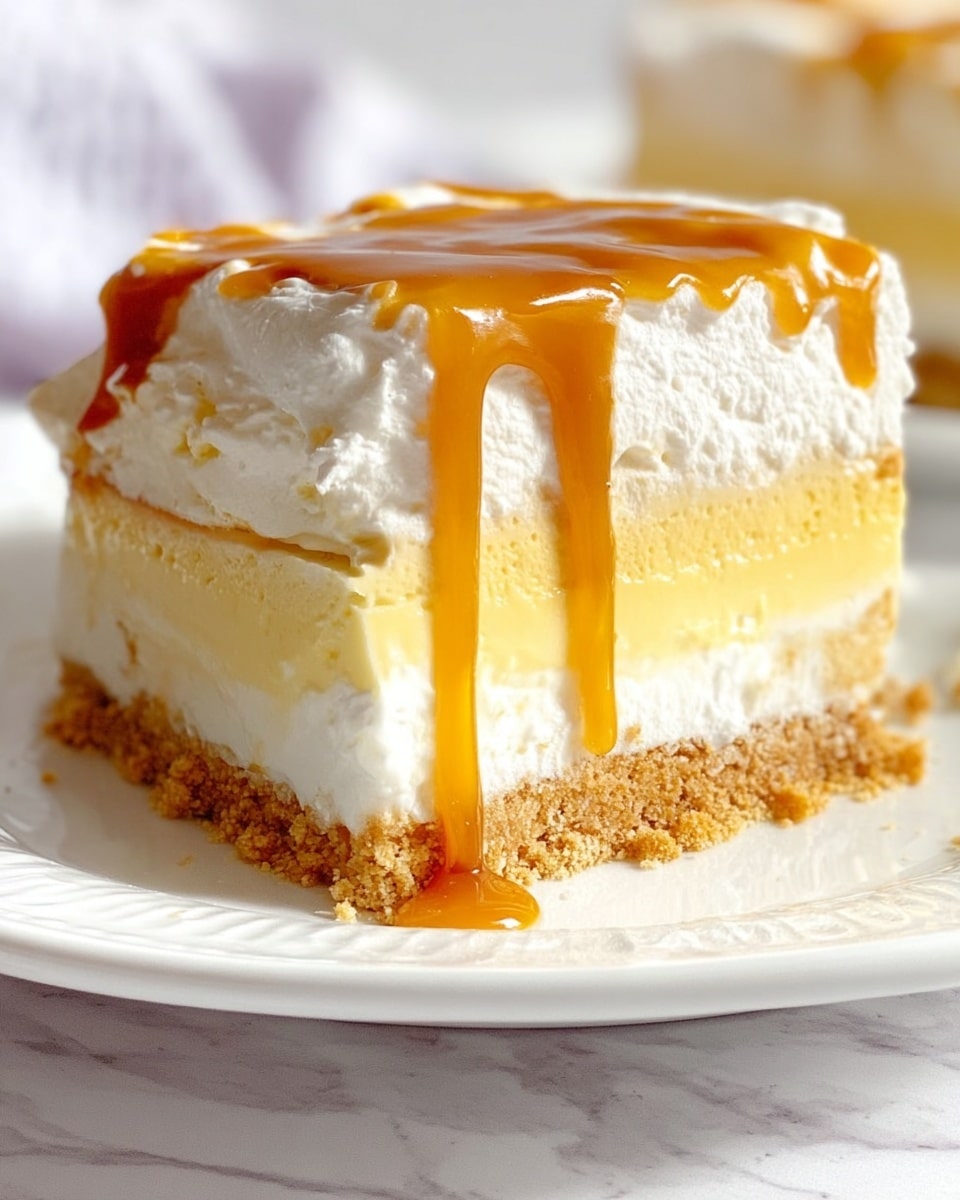
Picture this: the moment you dive your spoon into a luscious, creamy dessert that radiates the warm, inviting flavors of buttery caramel and soft vanilla, topped with a delicate swirl of butterscotch glaze. The aroma instantly whisks you away to a magical world, evoking memories of cozy Harry Potter movie nights or enchanted feasts shared with dear friends. This Harry Potter Butterbeer Lush Recipe is like a dreamy spellbinding treat that’s as comforting as it is impressive—perfect for gathering around the table with loved ones and sharing a little magic.
What’s even better? This decadent delight is surprisingly simple to pull together, yet it looks and tastes like it came straight out of a wizard’s kitchen. Whether you’re a seasoned wizard in the kitchen or just stepping into the cooking arena, this lush dessert promises luscious layers of buttery goodness with every bite. Trust me, once you try it, you’ll want to keep the recipe bookmarked for every special occasion—or whenever you simply crave a sweet escape.
Why You’ll Love This Harry Potter Butterbeer Lush Recipe
- Quick and Easy: Ready in about 4 hours and 15 minutes including chilling time, with only around 15 minutes of active prep—perfect for planning ahead without feeling rushed.
- Simple Ingredients: Uses common pantry staples and a few special touches like butterscotch syrup and butter flavoring to conjure that magical Butterbeer taste.
- Perfect for Entertaining: Layers of creamy cheesecake and pudding make an impressive show that will delight Harry Potter fans and dessert lovers alike.
- Make-Ahead Friendly: Prepare the dessert in advance—ideal for busy days when you want a fuss-free but show-stopping treat waiting in the fridge.
- Customizable: Easily adapt with your favorite pudding flavors or add subtle twists to suit your personal taste or dietary needs.
Why This Harry Potter Butterbeer Lush Recipe Works
What truly makes this Harry Potter Butterbeer Lush Recipe shine are the layers and the balance of textures and flavors. The buttery graham cracker crust provides the perfect crunchy foundation, creating a delightful contrast against the creamy, dreamy cheesecake and pudding layers. Using softened cream cheese beaten till smooth ensures the cheesecake layer remains velvety without lumps, while folding in Cool Whip adds that irresistible lightness. The butterscotch syrup and butter flavoring are the secret stars, imbuing each bite with the nostalgic buttery caramel notes reminiscent of real Butterbeer. Finally, chilling the dessert allows the layers to meld perfectly, setting everything into a luscious, sliceable masterpiece.
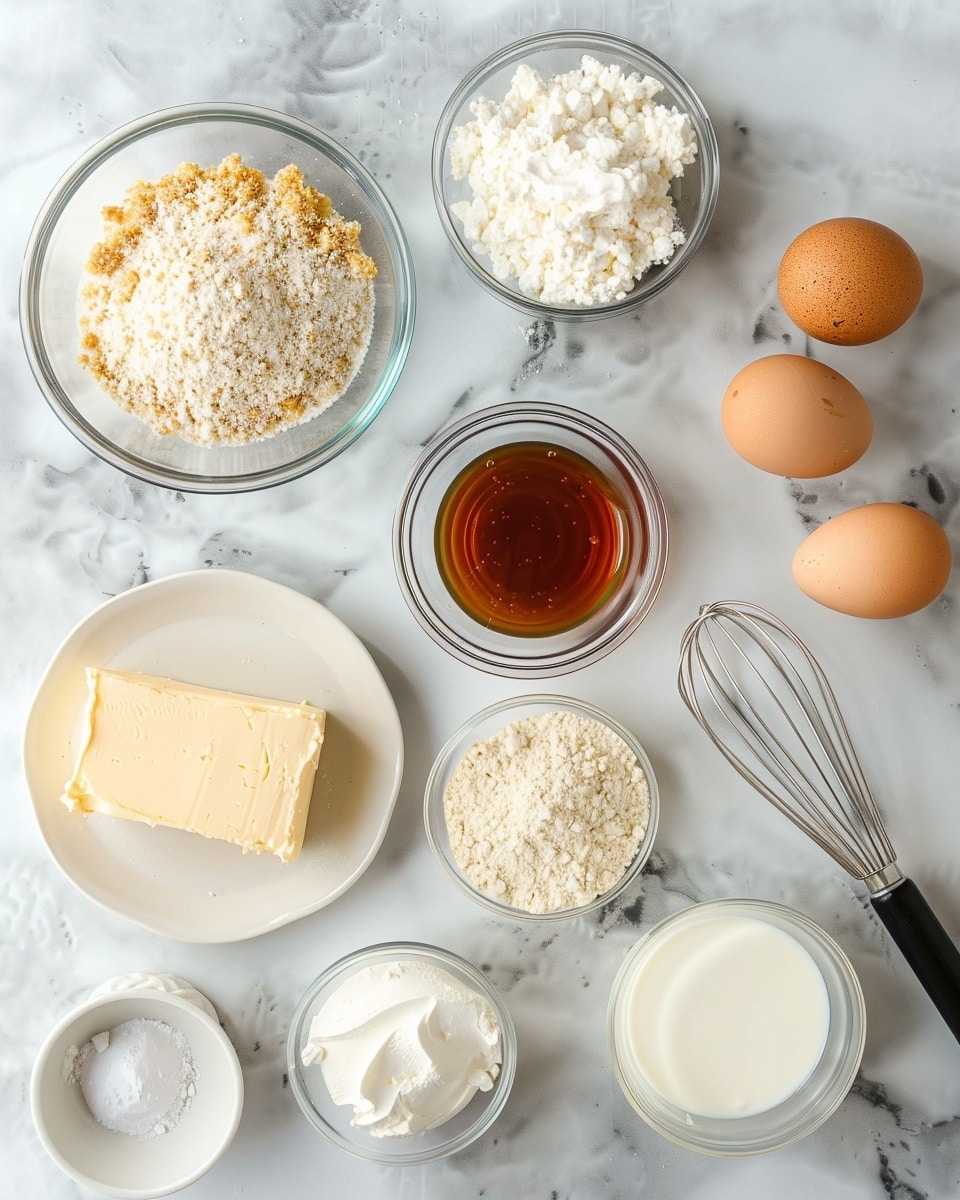
Ingredients You’ll Need
This recipe calls for straightforward ingredients that come together to create a magical, buttery, and creamy dessert that is both nostalgic and novel.
- Graham cracker crumbs: The crispy base that gives a subtle sweetness and texture to the crust.
- Melted butter: Binds the graham cracker crumbs together for a firm, buttery foundation.
- Sugar (optional): Adds a touch of sweetness to the crust, but you can omit if you prefer.
- Cream cheese: The creamy, tangy heart of the cheesecake layer for richness and depth.
- Powdered sugar: Sweetens the cheesecake layer evenly and dissolves perfectly.
- Cool Whip: Lightens the texture of both the cheesecake and pudding layers, making the dessert delightfully airy.
- Butter flavoring: Enhances the buttery notes that make this dessert taste like Butterbeer magic.
- Vanilla extract: Adds warmth and a classic vanilla charm to the cheesecake layer.
- Butterscotch syrup: Infuses dessert with that iconic caramel richness central to Butterbeer’s flavor.
- Instant vanilla pudding mix: Creates the luscious pudding layer that’s smooth and satisfying.
- Cold milk: The liquid base necessary to activate the pudding mix and give it creamy consistency.
Ingredient Substitutions & Tips
- Graham cracker crumbs: You can substitute with digestive biscuits or crushed vanilla wafers for a different but equally delicious base.
- Butter flavoring: If unavailable, a tiny bit of extra vanilla extract or a hint of caramel extract can fill in nicely.
- Cool Whip: Use fresh whipped cream for a fresher, less processed alternative—but fold gently to maintain airiness.
- Instant vanilla pudding mix: Homemade vanilla pudding can be used if you prefer a from-scratch approach, just be sure it sets firmly.
👨🍳 Pro Tips for Perfect Results
- Use softened cream cheese: This ensures a silky, lump-free cheesecake layer every time.
- Press crust firmly: Packing the graham cracker base tightly helps it hold its shape when slicing.
- Fold gently: Fold Cool Whip in carefully to keep the layers light and fluffy rather than dense.
- Chill long enough: Give the dessert at least 4 hours in the fridge to fully set and meld flavors beautifully.
- Swirl the topping: Don’t just drizzle butterscotch syrup—gently swirl with a knife for an enchanting artistic finish.
How to Make Harry Potter Butterbeer Lush Recipe
Step 1: Prepare the Crust
Combine 1 1/2 cups of graham cracker crumbs with 5 tablespoons of melted butter and 2 tablespoons of sugar if you’re using it. Stir until all the crumbs are evenly coated and look like wet sand. Press this mixture firmly into the bottom of an 8×8 inch baking dish, making sure the layer is even and compact. Pop it into the fridge to chill while you prepare the next layers.
💡 Pro Tip: Use the bottom of a glass to press down the crust for an even and tightly packed base.
Step 2: Make the Cheesecake Layer
In a medium bowl, beat 8 ounces of softened cream cheese until completely smooth and creamy. Gradually add 1/2 cup powdered sugar, 1/2 teaspoon butter flavoring, 1/2 teaspoon vanilla extract, and 2 tablespoons butterscotch syrup. Mix well until everything is fully incorporated. Next, gently fold in 1 cup of Cool Whip, preserving that airy texture. Spread this luscious cheesecake mixture evenly over the chilled crust.
💡 Pro Tip: Don’t overbeat once you add the Cool Whip; folding gently keeps the mixture light as a cloud.
Step 3: Whip Up the Pudding Layer
In a clean bowl, whisk together one small box of instant vanilla pudding mix with 1 1/2 cups of cold milk until it starts to thicken—just a couple of minutes. Stir in 1 tablespoon of butterscotch syrup and 1/2 teaspoon butter flavoring. Finally, fold in 1 cup of Cool Whip, blending into a velvety, dreamy layer. Spread this pudding mixture gently over the cheesecake layer, creating a beautiful two-layer effect.
💡 Pro Tip: Chill your bowl beforehand or use cold milk straight from the fridge to speed up thickening.
Step 4: Top It Off
Add a generous final layer of Cool Whip to cover the pudding. Drizzle butterscotch syrup over the top and use a spoon or butter knife to swirl it through the Cool Whip, making mesmerizing patterns that are as magical to look at as they are delicious to taste.
💡 Pro Tip: Be creative with swirls—try spirals, zigzags, or a gentle marbled effect to impress your guests.
Step 5: Chill and Serve
Refrigerate the entire dessert for at least 4 hours or overnight. This chilling time lets the layers set perfectly, flavors meld, and textures become sliceable but still luscious. When ready, cut into squares and enjoy the enchanted experience!
💡 Pro Tip: For clean slices, dip your knife in hot water and wipe between cuts.
Common Mistakes to Avoid
Learn from these common pitfalls:
- Using cold cream cheese: This can cause lumps and uneven texture in the cheesecake layer. Always soften first!
- Not pressing the crust firmly: A loosely packed crust will crumble when serving.
- Overmixing Cool Whip: Stir gently to maintain fluffiness; excessive mixing can deflate the layers.
- Rushing chilling time: Without sufficient refrigeration, the layers won’t set properly and the lush could become runny.
- Skipping the butter flavoring: It adds a key depth of buttery richness that defines the Butterbeer taste.
- Using warm milk for pudding: This slows down thickening, so always use cold milk straight from the fridge.
Delicious Variations to Try
Once you’ve mastered the classic Harry Potter Butterbeer Lush Recipe, these variations give you plenty of room to play—with only wholesome, halal-friendly ingredients, of course!
Salted Caramel Butterbeer Lush
Add a pinch of sea salt to the butterscotch syrup in both layers to create a sophisticated sweet-salty contrast that’s absolutely indulgent.
Chocolate Butterbeer Lush
Mix in a quarter cup of cocoa powder into the graham cracker crust or swirl chocolate syrup on top for a richer, chocolaty twist on this magical dessert.
Spiced Butterbeer Lush
Add 1/4 teaspoon cinnamon and a pinch of nutmeg to both cheese and pudding layers to warm up the flavor profile with cozy spices reminiscent of a Hogwarts feast.
Banana Butterbeer Lush
Layer thin slices of ripe banana between the cheesecake and pudding layers for a fresh fruity touch that pairs beautifully with butterscotch.
Coconut Butterbeer Lush
Top the final Cool Whip layer with toasted coconut flakes for a delightful tropical hint and added texture contrast.
How to Serve Harry Potter Butterbeer Lush Recipe
Garnishes
Freshly shaved butterscotch bits, a sprinkle of crushed graham crackers, or a tiny pinch of edible gold glitter will turn each serving into a magical visual feast.
Side Dishes
Serve alongside warm apple cider, rich hot chocolate, or a simple cup of your favorite tea to complement the lush’s buttery sweetness perfectly.
Creative Ways to Present
Serve the lush in individual clear cups layered for a charming peek at each creamy stage, or in a large trifle dish where guests can help themselves. You can even top with whipped cream piped through a star nozzle for an elegant touch!
Make Ahead and Storage
Storing Leftovers
Keep any leftovers refrigerated in an airtight container for up to 4 days. The flavors mellow and deepen, making it just as delightful the next day.
Freezing
This dessert freezes well—wrap tightly with plastic wrap and aluminum foil to prevent freezer burn. Thaw overnight in the fridge for a perfectly preserved treat.
Reheating
Serve chilled or at room temperature. Avoid microwaving as the delicate whipped layers may separate or become watery.
FAQs
Can I use fresh whipped cream instead of Cool Whip?
Absolutely! Fresh whipped cream works wonderfully and adds a natural creaminess. Just whip it to soft peaks and fold gently as instructed.
Is butterscotch syrup necessary?
Yes, it’s a key flavor in this recipe—bringing that unmistakable Butterbeer sweetness. If you cannot find it, caramel syrup is a decent substitute.
Can I make this dessert gluten-free?
Yes! Substitute the graham cracker crumbs with gluten-free cookie crumbs or crushed gluten-free cereal to keep it safe for gluten sensitivities.
How long should I chill the dessert?
A minimum of 4 hours is recommended to ensure the layers set firmly. Overnight chilling yields the best texture and flavor melding.
Can I double this recipe?
Definitely! Use a larger dish and double all ingredients. Just keep the layering order and chilling times consistent.
Is this recipe kid-friendly?
Yes! It contains no alcohol or caffeine and has a sweet, comforting flavor perfect for children and adults alike.
How do I get clean slices when serving?
Dip your knife in hot water before slicing and wipe it clean between cuts to keep those layers sharp and neat.
Can I prepare this dessert a day ahead?
Yes, making it a day in advance is perfect. It improves flavor fusion and makes serving stress-free.
Final Thoughts
This Harry Potter Butterbeer Lush Recipe is more than just a dessert; it’s a little slice of magic you can share with loved ones. Its creamy, buttery layers bring warmth and joy to any occasion, from festive celebrations to quiet cozy nights. The best part? It’s surprisingly easy to make but looks and tastes like something out of a wizarding wonderland.
Have you tried this Harry Potter Butterbeer Lush Recipe? I’d love to hear how it turned out! Leave a comment below. If you loved this recipe, please share it with friends and family. Happy cooking! 🧙♂️✨
PrintHarry Potter Butterbeer Lush Recipe
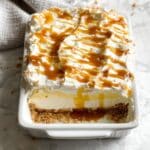
This Harry Potter Butterbeer Lush is a delightfully creamy and layered no-bake dessert inspired by the magical drink from the Harry Potter series. Featuring a graham cracker crust, a rich cream cheese cheesecake layer, a smooth butterscotch pudding layer, and topped with swirled Cool Whip and butterscotch syrup, this luscious treat is perfect for fans and dessert lovers seeking a sweet, easy-to-make indulgence.
- Prep Time: 20 minutes
- Cook Time: 0 minutes
- Total Time: 4 hours 20 minutes
- Yield: 9 servings 1x
- Category: Dessert
- Method: No-Cook
- Cuisine: American
Ingredients
For the Crust:
- 1 1/2 cups graham cracker crumbs
- 5 tbsp melted butter
- 2 tbsp sugar (optional)
For the Cheesecake Layer:
- 8 oz cream cheese, softened
- 1/2 cup powdered sugar
- 1 cup Cool Whip
- 1/2 tsp butter flavoring
- 1/2 tsp vanilla extract
- 2 tbsp butterscotch syrup
For the Pudding Layer:
- 1 small box instant vanilla pudding mix
- 1 1/2 cups cold milk
- 1 tbsp butterscotch syrup
- 1/2 tsp butter flavoring
- 1 cup Cool Whip
For the Topping:
- Cool Whip (enough to cover the top)
- Butterscotch syrup for swirling
Instructions
- Make the Crust: Combine graham cracker crumbs with melted butter and sugar (if using). Press the mixture firmly into the bottom of an 8×8-inch baking dish to form an even crust. Place the dish in the refrigerator to chill while preparing the next layers.
- Prepare the Cheesecake Layer: In a medium bowl, beat the softened cream cheese until smooth and creamy. Add the powdered sugar, butter flavoring, vanilla extract, and butterscotch syrup. Mix well to combine. Gently fold in the Cool Whip until the mixture is smooth and fluffy. Spread this cheesecake mixture evenly over the chilled crust.
- Prepare the Pudding Layer: In a clean bowl, whisk together the instant vanilla pudding mix and cold milk until it begins to thicken. Stir in the butter flavoring and butterscotch syrup. Carefully fold in the Cool Whip to maintain a light texture. Spread this pudding layer evenly over the cheesecake layer.
- Add the Topping: Spread a generous layer of Cool Whip over the pudding layer to completely cover it. Drizzle butterscotch syrup over the top, then use a spoon or knife to swirl it into the Cool Whip, creating a decorative marbled effect.
- Chill the Dessert: Refrigerate the assembled dessert for at least 4 hours, or preferably overnight, to allow it to set firmly and the flavors to meld beautifully before serving.
Notes
- For best results, ensure cream cheese is softened to avoid lumps in the cheesecake layer.
- Chilling time can be extended to overnight for a firmer texture.
- If you prefer a less sweet crust, omit the optional sugar.
- You can substitute Cool Whip with homemade whipped cream for a fresher taste.
- Butter flavoring enhances the butterscotch taste but can be omitted if unavailable.
- Use an 8×8 inch pan for the dessert to maintain proper thickness and layering.
Keywords: Harry Potter, Butterbeer Lush, no-bake dessert, cheesecake layer, butterscotch pudding, layered dessert, Cool Whip dessert