Mini Cheesecake Hearts: A Sweet Symphony of Love Recipe
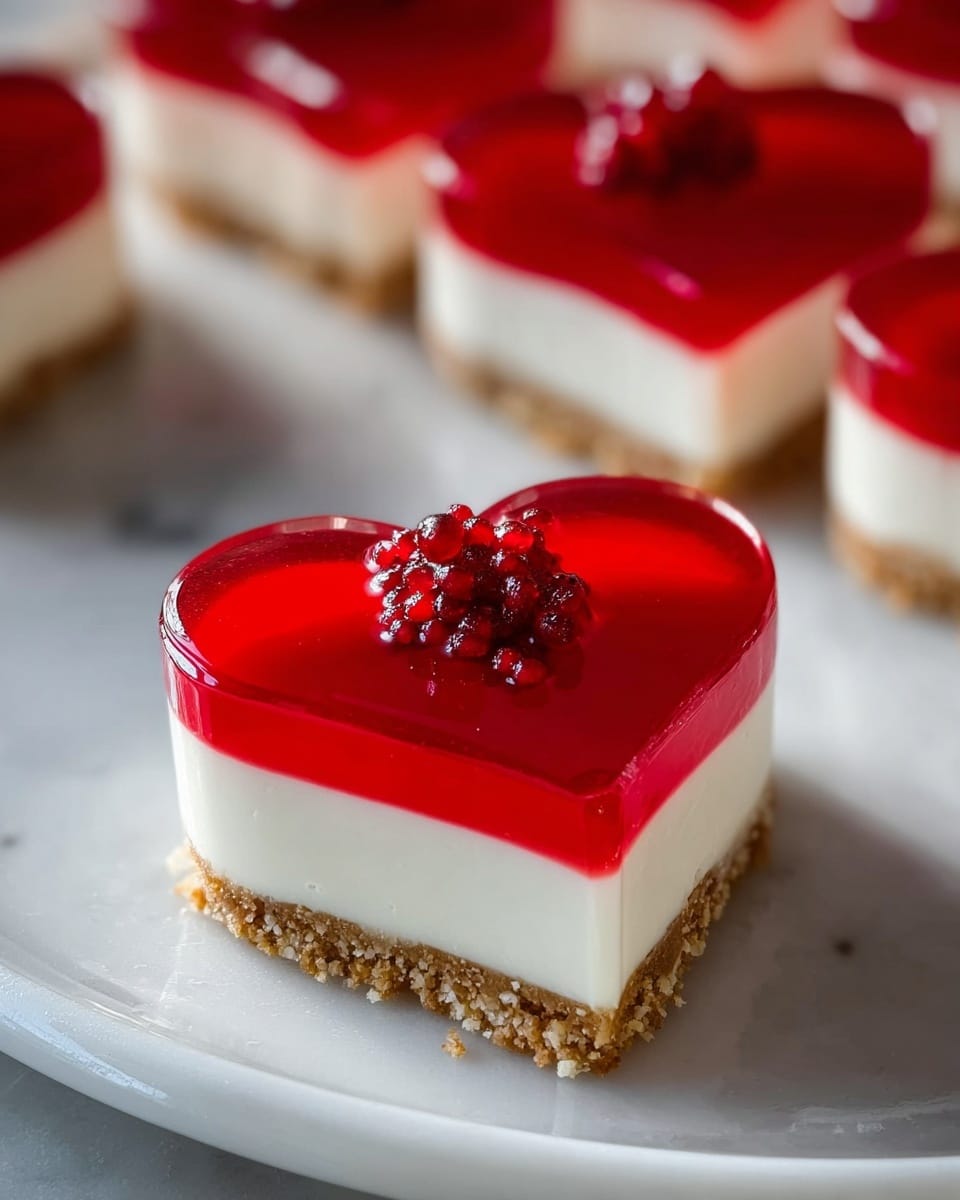
Picture this: the warm, inviting scent of buttery graham crackers mingling with sweet cream cheese filling fills your kitchen. As you gently slide the glossy, ruby-toned mini cheesecakes out of their heart-shaped molds, their velvety texture and vibrant swirl dazzle your eyes. These little treats are not just desserts; they are a heartfelt expression, a tender embrace of flavor that’s as quick and simple as it is utterly unforgettable. Whether you’re looking to impress guests, celebrate a special occasion, or simply indulge a sweet craving, this recipe brings love and joy to every bite.
Why You’ll Love This Mini Cheesecake Hearts: A Sweet Symphony of Love Recipe
- Ready in 40 minutes: From mixing to chilling, this recipe fits perfectly into a busy schedule without sacrificing any flavor or charm.
- Uses simple ingredients: Pantry staples like cream cheese and graham crackers come together to create something spectacularly delicious and approachable.
- Perfect for beginners: Easy-to-follow steps and minimal fuss make this ideal even if you’re just dipping your toes into cheesecake making.
- Impressive presentation: Heart-shaped mini cheesecakes with gorgeous red swirls look professional, cute, and ooze with love—perfect for gifting or party platters.
- Customizable: Play with colors, patterns, or toppings to make the mini cheesecake hearts uniquely yours for any celebration or season.
Why This Mini Cheesecake Hearts: A Sweet Symphony of Love Recipe Works
The secret behind this Mini Cheesecake Hearts: A Sweet Symphony of Love Recipe lies in its harmonious blend of texture and flavor. Softened cream cheese ensures a lusciously smooth filling without lumps, while careful mixing prevents cracking during baking by minimizing air bubbles. Pressing the graham cracker crust into heart molds (or shaping it later) adds a buttery crunch that perfectly contrasts the creamy filling. Adding gel food coloring and creating marbled layers turns ordinary cheesecake into a visual delight that tastes just as magical as it looks. This recipe balances simplicity with showstopping style, ensuring success every time.
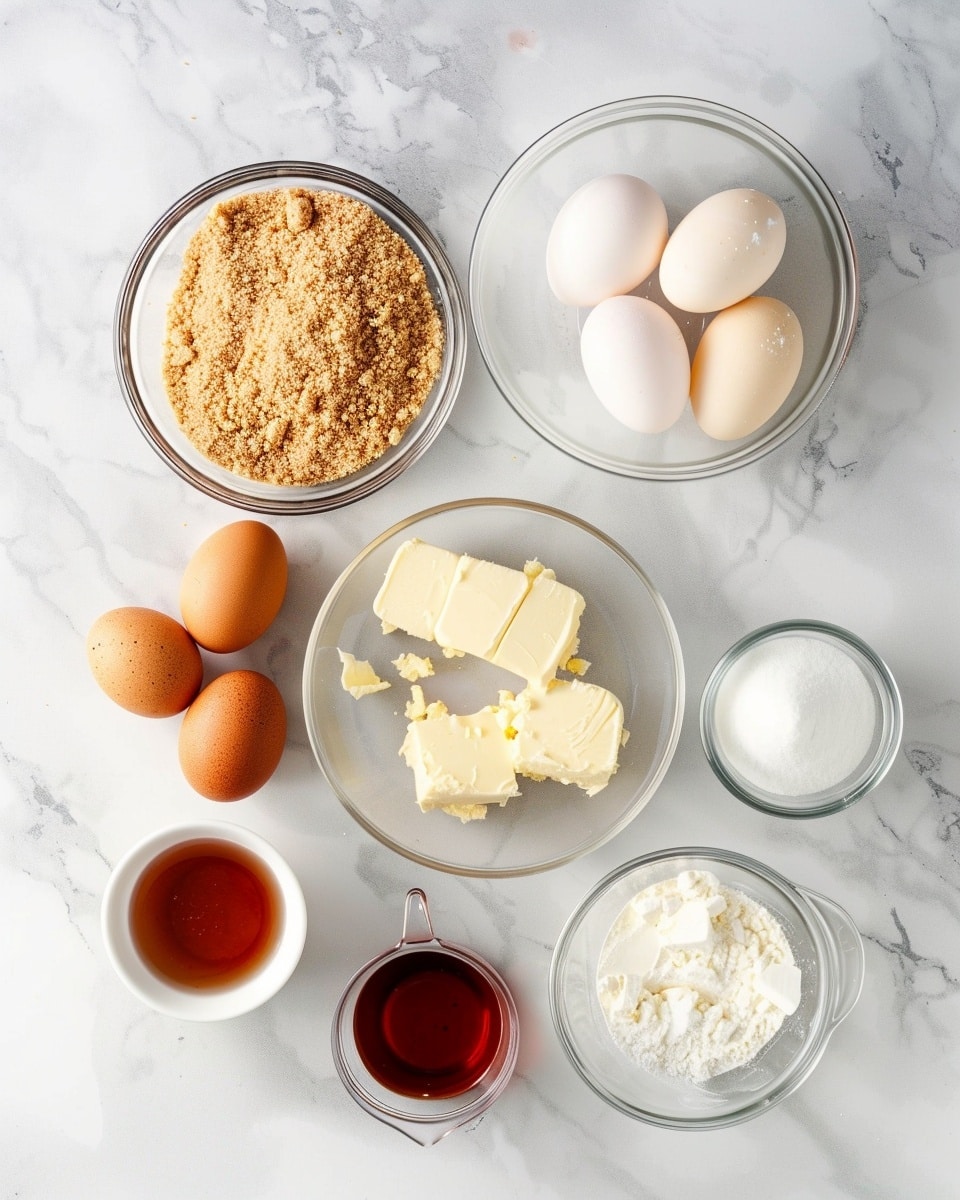
Ingredients You’ll Need
Each ingredient in this recipe plays a starring role, combining to create a simple yet sensational dessert experience.
- Graham cracker crumbs: Provides a sweet, crunchy base that feels like a cozy hug in every bite.
- Butter: Melted and mixed with crumbs to bind the crust with a rich, buttery flavor.
- Cream cheese: The creamy heart of the cheesecake, softened for perfect blending and smoothness.
- Granulated sugar: Adds sweetness without overpowering the delicate cream cheese taste.
- Eggs: Give structure and richness, helping the cheesecake hold its shape.
- Vanilla extract: Infuses warmth and depth to brighten every bite.
- Red gel food coloring: Creates those beautiful romantic hues that make these cheesecake hearts irresistible.
Ingredient Substitutions & Tips
- Graham cracker crumbs: Substitute with digestive biscuits or crushed vanilla wafers for a slightly different flavor profile.
- Butter: Use coconut oil or margarine to make a dairy-free crust, but expect a subtle flavor change.
- Cream cheese: For a lighter version, try using Neufchâtel cheese or mascarpone—just keep in mind texture may vary slightly.
- Red gel food coloring: Swap with natural beet juice or freeze-dried strawberry powder for a fruity twist and natural tint.
👨🍳 Pro Tips for Perfect Results
- Use room temperature cream cheese: This ensures a smooth batter without lumps or clumps.
- Pre-bake the crust slightly: It helps achieve a crisp base that keeps its texture after adding the filling.
- Don’t overmix the batter: Combining ingredients until just blended prevents cracks from too much air incorporation.
- Let the cheesecakes cool gradually: Leaving the oven door ajar after baking prevents sudden temperature shocks that cause cracking.
- Chill thoroughly: At least two hours in the refrigerator helps the flavors meld and the texture firm up beautifully.
How to Make Mini Cheesecake Hearts: A Sweet Symphony of Love Recipe
Step 1: Preheat the Oven
Begin by heating your oven to 350°F (175°C). This step is crucial for baking the mini cheesecakes evenly, helping them rise just right with no cracks. Using an oven thermometer can guarantee the temperature is accurate and reliable.
💡 Pro Tip: Preheating the oven fully before baking prevents uneven cooking and ensures a perfect texture.
Step 2: Prepare the Crusts
In a medium bowl, combine the crunchy graham cracker crumbs with luscious melted butter. Stir until the mixture feels like damp, fine sand, then firmly press it into your heart-shaped molds or mini muffin tins. For an extra crisp crust, bake them for 5 to 7 minutes ahead of time.
💡 Pro Tip: If you don’t have heart molds, bake in round tins and use a cookie cutter to shape hearts after baking for a fun DIY twist.
Step 3: Make the Cheesecake Filling
Beat your softened cream cheese and sugar together until decadently smooth and creamy, scraping down sides as needed. Slowly introduce eggs, one at a time, mixing gently to maintain that silky texture. Finally, stir in vanilla extract to soften and enrich the flavor.
💡 Pro Tip: Soft cream cheese at room temperature prevents lumps, giving your filling that dreamy consistency.
Step 4: Tint the Filling
Split your cheesecake batter into two bowls. Add a few drops of red gel food coloring to one and mix until you reach a lovely pink or deep red shade. Leave the other bowl natural for a beautiful contrast and the chance to create eye-catching layers or marbled designs.
💡 Pro Tip: Add color gradually for total control over your perfect shade.
Step 5: Layer and Swirl
Alternate spoonfuls of the red and white batters into each crust-lined mold. Use a toothpick or knife to gently swirl the colors for that dreamy two-tone marble effect or lay flat layers for a charming striped look. This step is where the magic starts to truly take shape.
💡 Pro Tip: Be gentle swirling to keep separate colors from fully blending—this creates a stunning visual symphony.
Step 6: Bake and Cool
Bake your mini cheesecakes for around 20 minutes, watching for set edges with a slight jiggle in the center. Once done, turn off the oven and leave the cheesecakes inside with the door cracked open for slow cooling. This prevents cracking and preserves that beautiful smooth surface.
💡 Pro Tip: Slow oven cooling is key for pristine, crack-free cheesecakes.
Step 7: Chill Before Serving
After cooling, pop your mini cheesecake hearts in the fridge for at least two hours, though overnight chilling is best. This allows them to firm up perfectly and intensifies the flavors, making every bite a luscious delight.
💡 Pro Tip: Chilling also makes them easier to handle and helps keep their shape when unmolded.
Common Mistakes to Avoid
Learn from these common pitfalls:
- Using cold cream cheese: Causes lumps and uneven filling texture.
- Overmixing the batter: Incorporates too much air and leads to cracks while baking.
- Skipping pre-bake of crusts: Results in soggy bottoms lacking that satisfying crunch.
- Opening oven door too soon: Can cause the cheesecakes to deflate or crack.
- Not cooling gradually: Sudden temperature changes cause unsightly cracks on your cheesecake surface.
- Under-chilling: Leads to runny texture, making the mini cheesecakes tricky to remove and serve.
Delicious Variations to Try
Once you’ve mastered the classic Mini Cheesecake Hearts: A Sweet Symphony of Love Recipe, jazz things up with these delightful twists:
Berry Bliss
Add a spoonful of mixed berry compote on top of the cheesecake before chilling for a fresh burst of tangy sweetness against the creamy filling.
Chocolate Swirl
Mix cocoa powder into half your filling for rich chocolate ribbons woven with classic cheesecake white—divine and irresistible.
Lemon Zest Surprise
Stir in fresh lemon zest and a splash of lemon juice into the batter for a vibrant, refreshing citrus aroma and flavor.
Nutty Crunch
Sprinkle chopped toasted pecans or almonds atop the mini cheesecakes before chilling to add delightful crunch and toasty warmth.
Caramel Drizzle
Finish with a drizzle of homemade or store-bought caramel sauce just before serving for a decadent, luscious touch.
How to Serve Mini Cheesecake Hearts: A Sweet Symphony of Love Recipe
Garnishes
Fresh raspberries, edible rose petals, or a dollop of whipped cream add elegance and extra sweetness. A light dusting of powdered sugar can make them look snow-kissed and magical.
Side Dishes
Pair these mini delights with a fresh fruit salad, a cup of rich coffee, or a glass of sparkling rosé for a truly memorable treat experience.
Creative Ways to Present
Display them on a tiered dessert tray with small flowers for special occasions or wrap a few in delicate cellophane tied with ribbon as charming edible gifts.
Make Ahead and Storage
Storing Leftovers
Keep your mini cheesecakes covered in an airtight container in the refrigerator for up to 4 days. This preserves their delicate texture and vibrant colors beautifully.
Freezing
Freeze unwrapped on a baking sheet until solid, then transfer to a sealed container or freezer bag. Thaw overnight in the fridge before serving to maintain flavor and texture.
Reheating
For best results, enjoy mini cheesecakes chilled or at room temperature. Avoid microwaving as this can alter their texture and cause weeping.
FAQs
Can I make these mini cheesecakes dairy-free?
Yes! Substitute cream cheese with a plant-based version and use dairy-free butter alternatives for the crust. The texture will be slightly different but still delicious.
What if I don’t have heart-shaped molds?
No worries! Use mini muffin tins with liners and cut the baked rounds into hearts using a cookie cutter, or serve them as rounds for a different look.
Can I add flavors other than vanilla?
Absolutely! Almond extract, lemon zest, or even a bit of cinnamon can add wonderful personality to the filling.
Why did my cheesecakes crack?
Cracks often come from overmixing, baking at a temperature that’s too high, or cooling too quickly. Follow the pro tips for smooth results.
Is red food coloring necessary?
Not at all! You can skip it or substitute with natural colorings like beet juice or freeze-dried strawberry powder for a more natural look.
Can I prepare these ahead for a party?
Yes! They keep well chilled and even taste better after soaking up flavors overnight. Just make sure to store them properly.
How do I prevent soggy crusts?
Pre-baking the crust for 5-7 minutes before filling helps crisp them up and prevents sogginess.
What’s the best way to remove mini cheesecakes from molds?
Silicone molds work best and allow easy popping out. If using metal tins, line them with cupcake liners or loosen edges gently with a small knife.
Final Thoughts
Baking these Mini Cheesecake Hearts: A Sweet Symphony of Love Recipe feels like creating edible poetry—each step brings you closer to a little treasure of silky creaminess and radiant color that speaks straight to the heart. They’re a perfect little indulgence to share or savor solo, bursting with flavor and charm. I hope these mini delights fill your kitchen and loved ones’ hearts with joy and sweetness!
Have you tried this Mini Cheesecake Hearts: A Sweet Symphony of Love Recipe? I’d love to hear how it turned out! Leave a comment below. If you loved this recipe, please share it with friends and family. Happy cooking! 😊
PrintMini Cheesecake Hearts: A Sweet Symphony of Love Recipe

Mini Cheesecake Hearts are a delightful and visually charming dessert featuring a creamy two-tone cheesecake filling on a crisp graham cracker crust. Perfect for special occasions like Valentine’s Day, these bite-sized treats combine the rich flavor of cream cheese with a hint of vanilla and a playful swirl of red food coloring to create a romantic and delicious sweet bite.
- Prep Time: 15 minutes
- Cook Time: 20 minutes
- Total Time: 3 hours 35 minutes
- Yield: 8 servings 1x
- Category: Dessert
- Method: Baking
- Cuisine: American
- Diet: Vegetarian
Ingredients
Crust
- 1 cup graham cracker crumbs
- ¼ cup (½ stick) butter, melted
Cheesecake Filling
- 16 oz (2 packages) cream cheese, softened
- ½ cup granulated sugar
- 2 large eggs
- 1 tsp vanilla extract
- Red gel food coloring, as needed
Instructions
- Preheat the Oven: Preheat your oven to 350°F (175°C). Using an oven thermometer is recommended for an accurate temperature, ensuring even baking and preventing cracks on the cheesecake surface.
- Prepare the Crusts: In a medium bowl, mix graham cracker crumbs with melted butter until the mixture resembles wet sand. Firmly press this mixture into heart-shaped molds, silicone molds, mini muffin tins lined with cupcake liners, or ramekins. If using muffin tins, lightly grease the pans to prevent sticking. For a crisper crust, bake the crusts for 5-7 minutes before adding the filling.
- Make the Cheesecake Filling: In a large bowl, beat the softened cream cheese with the sugar until smooth and creamy, using an electric mixer and scraping down the sides occasionally to avoid lumps.
- Add Eggs and Vanilla: Incorporate the eggs one at a time, beating well after each addition, then stir in vanilla extract. Mix just until combined to avoid incorporating too much air, which could cause cracking.
- Tint the Filling: Divide the batter into two portions. Add red gel food coloring to one portion, mixing until the desired shade of pink or red is achieved. Leave the other portion plain for a two-tone effect.
- Layer the Filling: Spoon alternate layers of the red and white cheesecake batter into the prepared molds to create patterns. For a marbled effect, gently swirl with a toothpick or knife. You can also layer by spoonfuls of each color.
- Bake: Bake for about 20 minutes or until the edges are set but the center remains slightly jiggly. Cooking times may vary based on oven and mold size. Test for doneness by gently shaking the molds – the centers should have a slight wiggle.
- Cool and Chill: Turn off the oven and leave the cheesecakes inside with the door slightly open to cool gradually, which helps prevent cracking. After cooling, refrigerate for at least 2 hours or overnight for firm, well-set mini cheesecakes ready to serve.
Notes
- Make sure the cream cheese is fully softened to room temperature before mixing for a smooth batter.
- Do not overmix the batter to avoid trapping air, which leads to cracking during baking.
- If heart-shaped molds are unavailable, use round molds and cut shapes after baking using a cookie cutter.
- Chill the cheesecakes overnight for the best texture and ease of removal from molds.
- Use gel food coloring to avoid adding extra liquid that could affect the batter consistency.
Keywords: mini cheesecakes, heart shaped cheesecake, Valentine’s Day dessert, two tone cheesecake, graham cracker crust, creamy cheesecake, holiday dessert