Mini Red Velvet Cakes with Cream Cheese Frosting and Fresh Berries Recipe
Picture this: the warm, rich aroma of cocoa mingling with subtle vanilla fills your kitchen while the gentle hum of the mixer whispers promises of something truly special. You’re carefully piping that luscious cream cheese frosting onto perfectly tender, crimson-hued mini cakes, knowing this delightful creation will bring smiles to everyone at your table. These Mini Red Velvet Cakes with Cream Cheese Frosting and Fresh Berries Recipe feel like a little slice of celebration in every bite—delectably moist, creamy, and bursting with fresh berry brightness. And the best part? It’s a feast for the eyes and soul, perfect for impressing loved ones or treating yourself to a sweet moment.
Why You’ll Love This Mini Red Velvet Cakes with Cream Cheese Frosting and Fresh Berries Recipe
- Perfect Timing: Ready in just over an hour, it fits wonderfully into your weekend baking plans or special occasion prep.
- Everyday Ingredients: No complicated pantry raids needed—common staples like flour, sugar, eggs, and cream cheese shine here.
- Elegant yet Approachable: These mini cakes make any gathering sparkle while staying beautifully simple to create.
- Visually Stunning: The vibrant scarlet sponge layered with creamy frosting and dotted with bright fresh berries creates a feast for the eyes that guests won’t forget.
- Delightfully Customizable: Whether you adore raspberries or strawberries, or prefer to tweak the frosting consistency, this recipe welcomes your personal twist.
Why This Mini Red Velvet Cakes with Cream Cheese Frosting and Fresh Berries Recipe Works
The magic behind these mini red velvet cakes lies in a few carefully balanced techniques and ingredients. First, the gentle folding of dry ingredients alternated with buttermilk keeps the batter tender and moist, ensuring that iconic velvet crumb. Next, the division of batter mixed with red dye intensifies that signature crimson hue without overwhelming the flavor. Finally, combining both cream cheese and mascarpone for the frosting provides a rich, silky creaminess that’s not overly sweet—perfectly complementing the cake’s mild cocoa undertones. The refrigeration step melds flavors beautifully, creating a harmonious bite every time.

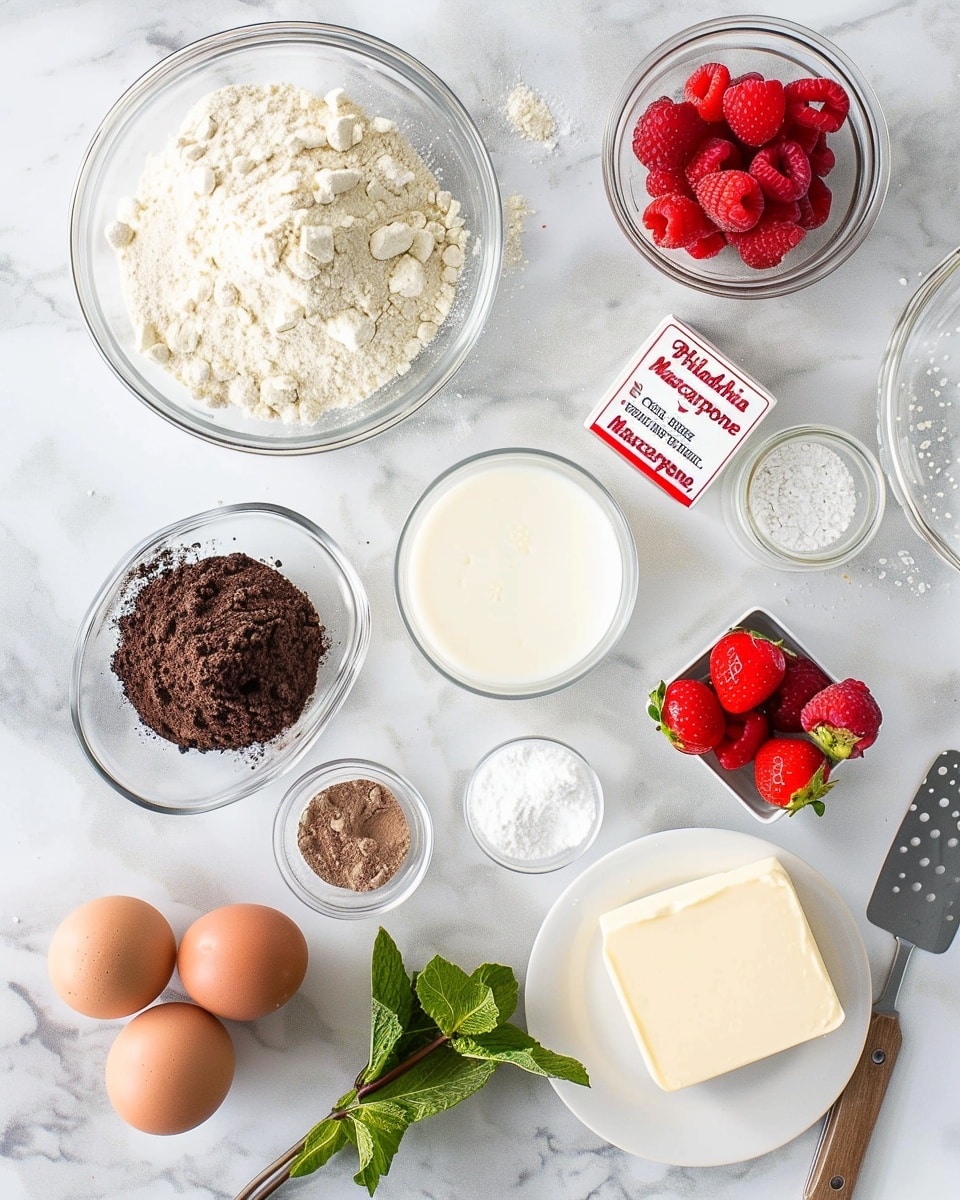
Ingredients You’ll Need
These ingredients are straightforward yet essential—each playing a role in crafting those soft, tender cakes and that dreamy frosting. Here’s what you’ll gather to make this masterpiece:
- Flour (250 gr./8.8 oz.): Provides the perfect structure for the cake’s tender crumb.
- Unsalted Butter (125 gr./4.4 oz.): Adds richness and moisture to the cake batter.
- Salt (1/4 teaspoon): Enhances all the flavors subtly.
- Cocoa Powder (1 tablespoon): Delivers that gentle chocolate note sharing its stage with the classic red velvet.
- Sugar (250 gr./8.8 oz.): Sweetens and tenderizes the cake.
- Eggs (2 large): Bind the batter and introduce lightness.
- Buttermilk (240 ml./8.1 fl. oz.): Keeps the crumb moist and tender with its mild acidity.
- Baking Powder (1 teaspoon): Ensures a perfectly risen cake with light texture.
- Red Baking Dye (1 teaspoon): Gives the cake that vibrant red color synonymous with red velvet.
- Vanilla Powder (1 teaspoon): Adds sweet, warm aroma elevating all flavors.
- Cream Cheese Philadelphia (125 gr./4.4 oz.): Forms the creamy base for the luscious frosting.
- Italian Mascarpone (125 gr./4.4 oz.): Infuses richness and silky smoothness into the frosting.
- Soft Cow’s Butter (100 gr./3.5 oz.): Adds smoothness and balances the tang of the cheese.
- Powdered Sugar (100 gr./3.5 oz.): Sweetens and lightens the frosting texture.
- Fresh Strawberries and Raspberries: Provide a vibrant, juicy finish and natural sweetness.
- Fresh Mint Leaves: Add refreshing aroma and a pop of green color.
Ingredient Substitutions & Tips
- Buttermilk: If unavailable, combine 1 tbsp lemon juice or vinegar with milk to make a substitute.
- Cream Cheese and Mascarpone: You can use all cream cheese if mascarpone is hard to find, but mascarpone enriches the texture.
- Red Baking Dye: Natural beetroot powder can be used for a more natural color, though the hue may be less intense.
- Butter: Unsalted remains best, but if salted is used, reduce added salt slightly.
👨🍳 Pro Tips for Perfect Results
- Use room temperature ingredients: This ensures smoother mixing and better texture.
- Don’t overmix the batter: Fold dry ingredients gently to avoid tough cakes.
- Chill your cakes well: Refrigeration allows frosting to set and flavors to marry beautifully.
- Fresh berries last-minute: Add berries just before serving for the freshest taste and appearance.
- Use a stainless steel ring for perfect shapes: This helps create uniform mini cakes for stunning presentation.
How to Make Mini Red Velvet Cakes with Cream Cheese Frosting and Fresh Berries Recipe
Step 1: Preheat and Prepare
Set your oven to 170°C (338°F). Line a baking tray with parchment paper; this will prevent sticking and make cleanup a breeze. Having your tools and ingredients ready sets the stage for smooth baking.
💡 Pro Tip: Use an oven thermometer to ensure precise temperature control for even baking.
Step 2: Combine Dry Ingredients
Sift together flour, salt, cocoa powder, and vanilla powder in a large bowl. This step ensures no lumps and evenly distributes the cocoa and vanilla, lending a uniform deep flavor throughout each bite.
💡 Pro Tip: Sifting also aerates the flour mixture, resulting in a lighter cake crumb.
Step 3: Cream Butter and Sugar
In another bowl, whip the unsalted butter with sugar until the mixture is pale and fluffy. This aerated base is critical for lightness and sweetness.
💡 Pro Tip: Use a stand mixer or handheld mixer to save time and get that perfect creamy texture.
Step 4: Beat in the Eggs
Gently add eggs one at a time to the creamed butter and sugar, beating on high speed to ensure smooth incorporation. This creates a stable base to hold the cakes’ structure while keeping them tender.
💡 Pro Tip: Don’t rush adding eggs; beating them in slowly helps maintain the airy texture.
Step 5: Mix Red Dye with Buttermilk
Whisk 2 tbsp of batter with the red baking dye and 1 tbsp buttermilk in a small bowl. This concentrated splash of color makes your cakes vibrantly red without overpowering the batter or flavor.
💡 Pro Tip: Stir thoroughly to avoid streaks and uneven coloring.
Step 6: Alternate Dry Mix and Buttermilk
With the mixer at low speed, add the dry ingredients in three parts, alternating with buttermilk—start and finish with the dry mix. Mix each addition just until incorporated. Overmixing here can toughen your cake crumb, so gentle is key.
💡 Pro Tip: Scrape down the bowl as you go to ensure an even mix.
Step 7: Bake the Cake Base
Pour the batter into the lined tray and smooth the surface. Bake for about 20 minutes or until a toothpick inserted near the center comes out clean and the cake springs back lightly to the touch. Avoid overbaking to keep the cake moist.
💡 Pro Tip: Rotate the tray halfway through baking for even browning.
Step 8: Cool Completely
Remove from the oven and let cool in the pan placed on a wire rack. Cooling completely before cutting and frosting is crucial to prevent frosting meltdown and soggy layers.
Step 9: Prepare the Cream Cheese Frosting
Whisk butter and powdered sugar in one bowl until fluffy. In a separate bowl, gently fold together the Philadelphia cream cheese with the mascarpone using a spoon or spatula—avoid mixers for this part to maintain silky texture. Combine the two mixtures carefully and transfer to a pastry bag fitted with a 6 mm round tip.
💡 Pro Tip: Keep frosting cool but pliable for smooth piping.
Step 10: Assemble the Mini Cakes
Using a 7 cm diameter stainless steel ring, cut 16 identical circles from the cooled cake base. Pipe the cream cheese frosting generously over 8 of these cake circles, then sandwich with the remaining 8. Decorate the tops as you like with extra frosting, then refrigerate the mini cakes for several hours.
💡 Pro Tip: Press gently when sandwiching to avoid squishing the frosting out.
Step 11: Garnish and Serve
Before serving, allow the cakes to sit at room temperature for about 15 minutes for the frosting to soften slightly. Adorn with fresh strawberries or raspberries and a sprig of mint for a fresh, inviting finish.
💡 Pro Tip: Using ripe but firm berries keeps the presentation neat and juicy.
Common Mistakes to Avoid
Learn from these common pitfalls:
- Overmixing the batter: This can lead to dense, tough cakes rather than tender velvet crumb.
- Skipping cake cooling: Frosting warm cakes causes melting and uneven texture.
- Using too much red dye: Overdoing it can make color overpower flavor and affect texture.
- Not measuring flour accurately: Too much flour results in dry cake; spoon and level flour for best results.
- Ignoring oven temperature accuracy: Too hot and the cakes dry out; too cool and they won’t rise properly.
- Adding eggs too quickly: This can curdle the butter mixture, causing texture issues.
Delicious Variations to Try
Once you’ve mastered the classic version of this Mini Red Velvet Cakes with Cream Cheese Frosting and Fresh Berries Recipe, why not experiment with these tempting twists?
Berry Medley
Mix raspberries, blueberries, and blackberries for a jewel-toned fresh berry bouquet atop your mini cakes for even more colorful bursts of flavor.
Orange Zest Infusion
Add a teaspoon of finely grated orange zest to the batter and a splash of fresh orange juice to the frosting for a bright citrusy twist that plays beautifully with the cocoa notes.
Almond Crunch
Sprinkle finely chopped toasted almonds inside the frosting layers or on top to add delightful textural contrast and nutty warmth.
Coconut Dream
Fold shredded coconut gently into the batter or sprinkle on top for a tropical hint that pairs surprisingly well with the cream cheese frosting and berries.
Rosewater Elegance
A small teaspoon of rosewater in the frosting adds an exquisite floral perfume, elevating these mini cakes to elegant tea-time treats.
How to Serve Mini Red Velvet Cakes with Cream Cheese Frosting and Fresh Berries Recipe
Garnishes
Fresh berries and mint are classic complementary garnishes, but feel free to sprinkle a light dusting of powdered sugar or edible flower petals for an extra glam touch.
Side Dishes
Pair these mini cakes with a cup of freshly brewed coffee, a glass of cold milk, or herbal tea like chamomile or mint for a harmonious and indulgent snack time.
Creative Ways to Present
Serve your mini cakes on tiered cake stands for a charming party centerpiece, or plate them individually on pretty dessert plates with a side of berry coulis for a restaurant-style impression.
Make Ahead and Storage
Storing Leftovers
Keep leftover mini cakes refrigerated in an airtight container to maintain frosting freshness and cake moistness. They stay delightful for up to 3 days.
Freezing
You can freeze assembled mini cakes by wrapping them individually in plastic wrap, then placing in a freezer-safe container. Thaw in the refrigerator overnight before serving.
Reheating
Allow refrigerated cakes to come to room temperature for 15-20 minutes before serving to enjoy the best flavor and frosting texture. Avoid microwaving, which can melt the frosting unevenly.
FAQs
Can I make these mini cakes vegan?
This particular Mini Red Velvet Cakes with Cream Cheese Frosting and Fresh Berries Recipe relies on dairy and eggs, but vegan alternatives for butter, cream cheese, and eggs can be used with appropriate adjustments.
What if I don’t have a stainless steel ring for cutting?
A clean glass or jar rim with the right diameter can substitute. Just press gently and twist to cut out neat rounds.
Can I prepare the cakes without mascarpone?
Yes, you can use all cream cheese for the frosting, though mascarpone adds extra creaminess and smooth texture.
How do I prevent my frosting from being too runny?
Ensure your butter and cheeses are cold but slightly softened. Too warm ingredients can cause runny frosting. Adjust powdered sugar quantity if needed.
Can I use store-bought red velvet cake mix instead?
Certainly, but homemade from scratch ensures the freshest flavors and allows you to control ingredients and quality.
Is it essential to refrigerate the mini cakes?
Yes, chilling helps the frosting firm up and flavors meld, resulting in a better texture and taste.
What berries work best for garnish?
Strawberries and raspberries are classic, but blueberries or blackberries can add variety and sweetness.
Can I double the recipe for a bigger batch?
Absolutely! Just ensure you have enough baking space and adjust baking time as needed.
Final Thoughts
These Mini Red Velvet Cakes with Cream Cheese Frosting and Fresh Berries Recipe hold a special place in my heart—a perfect blend of tradition, indulgence, and freshness that’s perfect for any celebration or quiet indulgence. Their velvety texture, creamy frosting, and jewel-bright berries come together in a way that’s as beautiful to behold as it is heavenly to taste. I hope this recipe fills your kitchen with warmth and your gatherings with smiles.
Have you tried this Mini Red Velvet Cakes with Cream Cheese Frosting and Fresh Berries Recipe? I’d love to hear how it turned out! Leave a comment below. If you loved this recipe, please share it with friends and family. Happy cooking! 🍰🍓
PrintMini Red Velvet Cakes with Cream Cheese Frosting and Fresh Berries Recipe

Delight in these Mini Red Velvet Cakes, perfect bite-sized treats featuring a moist red velvet base layered with luscious cream cheese and mascarpone frosting. Topped with fresh berries and mint leaves, these elegant cakes are ideal for parties or an indulgent snack.
- Prep Time: 25 minutes
- Cook Time: 20 minutes
- Total Time: 45 minutes plus chilling time
- Yield: 8 mini cakes 1x
- Category: Dessert
- Method: Baking
- Cuisine: American
- Diet: Vegetarian
Ingredients
For the Dough:
- 250 gr./8.8 oz. flour
- 125 gr./4.4 oz. unsalted butter
- 1/4 teaspoon salt
- 1 tablespoon cocoa powder
- 250 gr./8.8 oz. sugar
- 2 large eggs
- 240 ml./8.1 fl. oz. buttermilk
- 1 teaspoon baking powder
- 1 teaspoon red baking dye
- 1 teaspoon vanilla powder
For the Cream:
- 125 gr./4.4 oz. Cream cheese “Philadelphia”
- 125 gr./4.4 oz. Italian cream cheese “Mascarpone”
- 100 gr./3.5 oz. soft cow’s butter
- 100 gr./3.5 oz. Powdered sugar
To Garnish:
- Strawberries or Raspberries
- Fresh mint leaves
Instructions
- Preheat and Prepare Pan: Preheat the oven to 170°C (338°F). Line a baking tray with baking paper and set aside.
- Mix Dry Ingredients: In a large bowl, sift together flour, salt, cocoa powder, and vanilla powder to ensure even distribution and a smooth batter.
- Whip Butter and Sugar: In another bowl, beat the unsalted butter and sugar until the mixture becomes white and fluffy, forming a creamy base for the cake.
- Combine Butter, Sugar, and Eggs: Using a mixer, beat the butter, sugar, and eggs on high speed until smooth and creamy, adding eggs one at a time to incorporate thoroughly.
- Prepare Red Coloring Mix: In a small bowl, mix 2 tablespoons of the batter with the red food coloring and 1 tablespoon of buttermilk; stir well and set aside for vibrant color enhancement.
- Incorporate Dry Ingredients and Buttermilk: On low mixer speed, add the dry ingredients in three parts alternated with buttermilk, beginning and ending with dry ingredients. Mix just until incorporated to avoid overmixing.
- Bake the Cake Base: Pour the batter evenly into the prepared tray and smooth the surface. Bake for approximately 20 minutes or until the cake springs back when touched and a toothpick inserted comes out clean. Avoid overbaking to keep the cake moist.
- Cool the Cake: Remove the cake from the oven and let it cool completely on a wire rack within the pan.
- Prepare the Frosting: Whisk the softened butter and powdered sugar until smooth in one bowl. Separately, mix the cream cheese and mascarpone gently with a spoon or spatula. Combine the two mixtures carefully, then transfer to a pastry bag fitted with a 6 mm round tip.
- Cut Mini Cakes: Once fully cooled, use a 7 cm (2.75 inch) diameter ring mold to cut out 16 identical cake circles.
- Assemble the Mini Cakes: Pipe frosting onto 8 of the cake circles, then top each with the remaining 8 circles to create mini sandwiches. Decorate the tops with additional piped frosting as desired.
- Chill and Garnish: Refrigerate the assembled mini cakes for several hours. Before serving, allow them to sit at room temperature for about 15 minutes and garnish with fresh berries and mint leaves for a fresh finish.
Notes
- Do not overmix the batter once dry ingredients are added to maintain a tender crumb.
- Avoid overbaking to prevent drying out the cake base.
- Use fresh berries and mint right before serving to ensure they remain vibrant and fresh.
- Make sure the cakes are completely cooled before cutting and frosting to avoid melting or crushing.
- Keep the cakes refrigerated until serving to maintain frosting firmness and freshness.
Keywords: mini red velvet cakes, red velvet mini cakes, cream cheese frosting, mascarpone frosting, bite-sized red velvet, party desserts, easy red velvet recipe