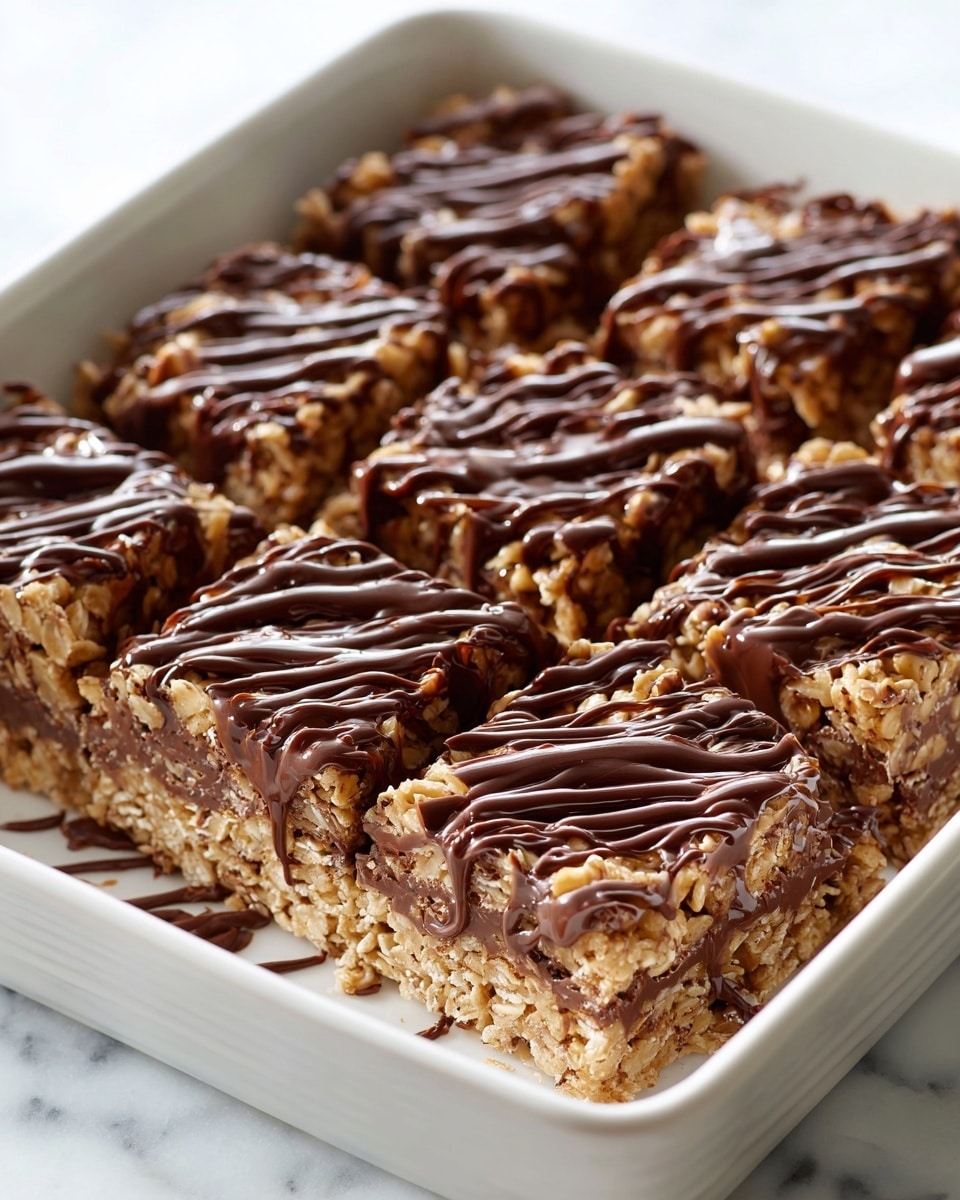
No Bake Chocolate Oatmeal Bars Recipe
Picture this: the rich, indulgent aroma of melted butter and brown sugar warming in your kitchen, mingled with the comforting scent of rolled oats. As you press the glossy, velvety chocolate and peanut butter mixture into smooth layers, anticipation builds. These No Bake Chocolate Oatmeal Bars are not just a treat for your taste buds but a feast for your senses—easy to make, no oven required, and unbelievably delicious. Whether you’re craving a quick snack or a homemade gift that screams love, these bars deliver every single time.
Why You’ll Love This No Bake Chocolate Oatmeal Bars Recipe
- Ready in 30 minutes: From start to finish, this recipe comes together quickly, giving you more time to savor your creation.
- Uses simple ingredients: Pantry staples like oats, butter, and peanut butter transform into a decadent treat without any fuss.
- Perfect for beginners: No baking skills necessary—just melt, mix, press, and chill. It doesn’t get easier than this!
- Impressive presentation: Layered like a chocolatey masterpiece, these bars look as delightful as they taste.
- Customizable: Easy to swap ingredients or add your favorite nuts, seeds, or dried fruits to make it your own.
Why This No Bake Chocolate Oatmeal Bars Recipe Works
This recipe nails the perfect balance thanks to simple but powerful techniques and ingredients. The initial melting of butter and brown sugar creates a luscious syrup that binds the oats beautifully, lending structure and that signature chewy texture. Layering the peanut butter and chocolate mixture in the middle introduces an irresistible creamy richness that contrasts with the hearty oats. The final chilling step lets everything set into firm, sliceable bars without any baking stress. It’s science and soul all wrapped up in one delightful snack.
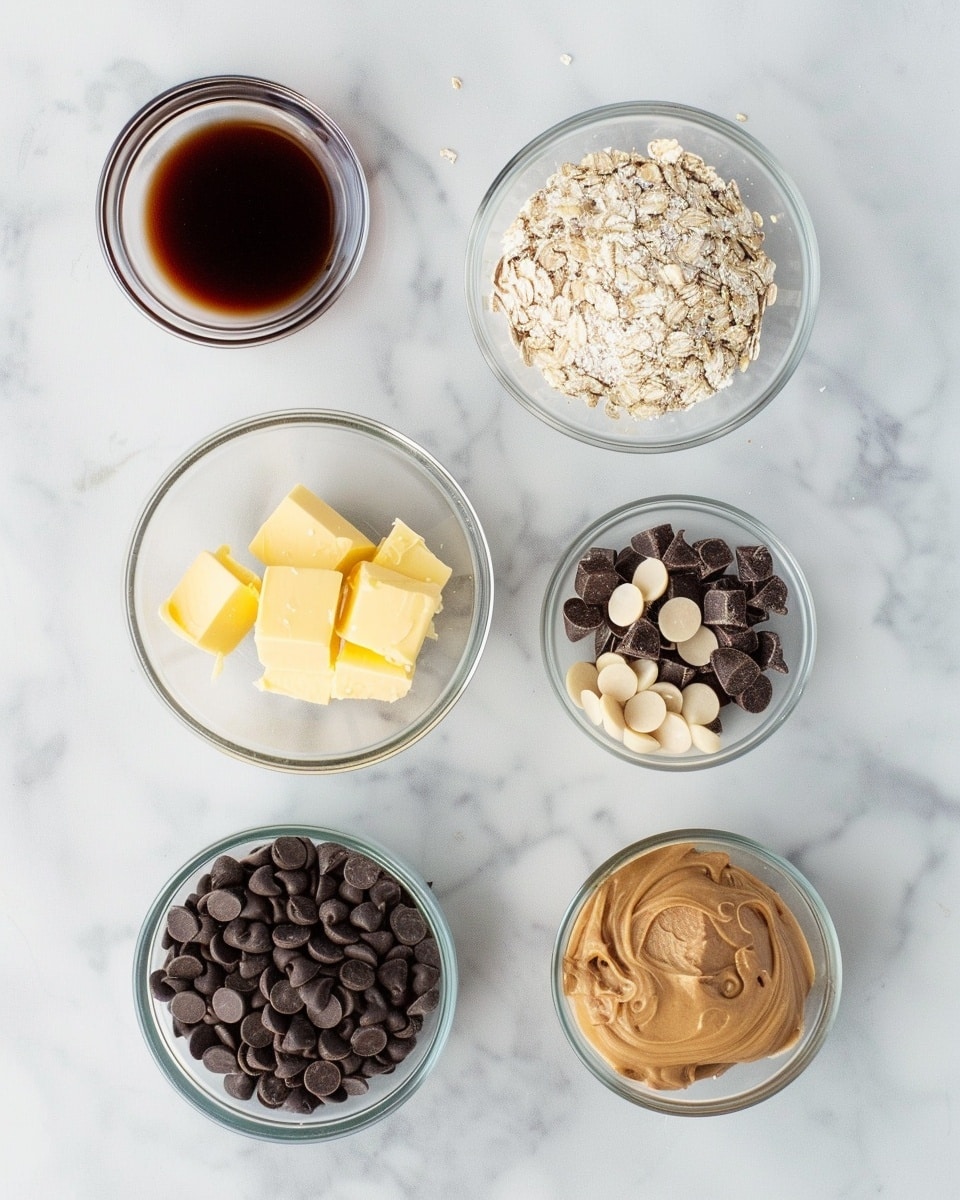
Ingredients You’ll Need
These straightforward ingredients combine to create layers of irresistible flavor and texture. Each component plays a vital role, making these bars a home run every time.
- Butter: Provides richness and helps bind the oats.
- Brown sugar: Adds sweetness and creates the sticky syrup that holds everything together.
- Vanilla extract: A splash to enhance the chocolate and peanut butter flavors.
- Rolled oats: The hearty base that adds texture and wholesome goodness.
- Semisweet or dark chocolate chips: For that melty, decadent chocolate layer.
- Peanut butter: Adds creamy, nutty flavor and pairs perfectly with chocolate.
Ingredient Substitutions & Tips
- Butter: Swap for coconut oil for a dairy-free version with a hint of tropical flavor.
- Brown sugar: Use coconut sugar or maple syrup for a natural sweetness alternative.
- Rolled oats: Quick oats can work but expect a softer texture; for gluten-free needs, ensure certified gluten-free oats.
- Peanut butter: Try almond or cashew butter for a different nutty twist, or sunflower seed butter for a nut-free treat.
👨🍳 Pro Tips for Perfect Results
- Use parchment paper: Line your pan with it for easy lifting and neat edges.
- Don’t rush the boiling step: Allow the butter and sugar to fully combine and bubble gently for ideal texture.
- Layer carefully: Press the oat mixture firmly but gently to ensure bars hold together well.
- Chill thoroughly: At least 2 hours in the fridge makes cutting clean bars effortless.
- Store properly: Keep leftovers covered in the fridge to maintain chewiness.
How to Make No Bake Chocolate Oatmeal Bars Recipe
Step 1: Prepare Your Pan
Line an 8 or 9-inch square baking dish with parchment paper, leaving overhang on the sides. This simple step ensures your bars lift out cleanly, making slicing and serving a breeze.
💡 Pro Tip: Use a pan with straight sides for even layers and easy cutting.
Step 2: Melt Butter and Brown Sugar
In a large saucepan over medium heat, melt together the butter and brown sugar until smooth and the sugar is fully dissolved. Stir constantly to prevent burning.
💡 Pro Tip: Look for tiny bubbles forming—it’s key for a fantastic chewy texture.
Step 3: Add Vanilla and Oats
Stir in the vanilla extract, then mix in the rolled oats until everything is well coated. Cook on low heat for 3 to 4 minutes, allowing the flavors to meld and the oats to soak up that buttery sweetness.
💡 Pro Tip: Don’t rush this step; it makes the difference between crumbly bars and perfectly sticky ones.
Step 4: Press the First Layer
Pour half of the oat mixture into your prepared pan. Spread it evenly and press down firmly with a spatula or your hands to create a solid base.
💡 Pro Tip: Use the back of a measuring cup for perfectly flat and compact layers.
Step 5: Melt Chocolate and Peanut Butter
In a microwave-safe bowl, melt together the chocolate chips and peanut butter in 20-second bursts, stirring until silky smooth and combined.
💡 Pro Tip: Stir often to prevent overheating and achieve a glossy finish.
Step 6: Layer the Chocolate Filling
Pour the chocolate-peanut butter mixture over the oat crust, reserving a small amount for drizzling. Spread gently but evenly for that luscious middle layer.
💡 Pro Tip: A small offset spatula works wonders for an even spread.
Step 7: Add the Top Layer and Drizzle
Top with the remaining oat mixture, pressing gently to combine. Drizzle the reserved chocolate mixture on top for an irresistible finishing touch.
💡 Pro Tip: Use a spoon or piping bag for neat, decorative chocolate drizzles.
Step 8: Chill and Set
Refrigerate your bars for 2 to 3 hours or overnight until they firm up completely. This cooling step transforms layers into firm, sliceable bars.
💡 Pro Tip: Let the bars reach room temperature a little before cutting to avoid cracking.
Common Mistakes to Avoid
Learn from these common pitfalls:
- Under-boiling the sugar mixture: Results in bars that are too soft and don’t hold their shape.
- Over-boiling: Can make the bars dry and crumbly instead of chewy.
- Skipping parchment paper: Makes it harder to remove bars neatly from the pan.
- Not pressing layers firmly enough: Leads to bars that fall apart easily.
- Cutting when bars are too cold: Causes cracking and uneven edges.
- Using quick oats instead of rolled: Alters texture, making bars less chewy and more crumbly.
Delicious Variations to Try
Once you’ve mastered the classic No Bake Chocolate Oatmeal Bars Recipe, why not mix things up a bit?
Nutty Delight
Stir in chopped walnuts, almonds, or pecans to the oat mixture for extra crunch and a lovely nutty flavor.
Coconut Dream
Add shredded coconut to the oats for a tropical twist that pairs beautifully with chocolate and peanut butter.
Berry Bliss
Mix in dried cranberries, cherries, or raisins to add bursts of tartness and chewiness.
Spiced Cinnamon Chocolate
Sprinkle cinnamon or a pinch of cayenne into the oat mixture for a warm, spicy kick that elevates the flavors.
Sunflower Seed Butter Swap
For a nut-free option, use sunflower seed butter instead of peanut butter, maintaining the creamy texture and richness.
How to Serve No Bake Chocolate Oatmeal Bars Recipe
Garnishes
Finish with a light dusting of cocoa powder, a sprinkle of sea salt, or chopped nuts for elevated presentation and flavor contrast.
Side Dishes
Serve alongside a tall glass of cold milk, creamy coffee, or a fresh fruit salad to balance the richness of the bars.
Creative Ways to Present
Wrap individual bars in parchment paper tied with twine for perfect gift-giving. Or arrange bites on a dessert tray for parties, surrounded by fresh berries and edible flowers for visual appeal.
Make Ahead and Storage
Storing Leftovers
Keep your bars in an airtight container in the fridge for up to 5 days. This preserves their chewy texture and rich flavors beautifully.
Freezing
Wrap bars individually in plastic wrap and place in a freezer-safe container. They freeze well for up to 3 months. Thaw in the fridge overnight before enjoying.
Reheating
If you prefer softer bars, warm them briefly at room temperature or microwave for 10-15 seconds. This will melt the chocolate slightly for an even more indulgent bite.
FAQs
Can I use quick oats instead of rolled oats?
While you can, quick oats make the bars less chewy and more crumbly. Rolled oats are best for the ideal texture.
Do these bars need to be refrigerated?
Yes, refrigeration helps the bars set properly and maintain their shape and texture.
Can I substitute almond butter for peanut butter?
Absolutely! Almond butter adds a slightly different nutty flavor that pairs wonderfully with chocolate.
Is it possible to make these bars vegan?
Yes! Use vegan butter or coconut oil, and dairy-free chocolate chips to make them completely vegan-friendly.
How long will these bars keep?
Stored in an airtight container in the fridge, they stay fresh for about 5 days.
Can I add protein powder to this recipe?
Yes, adding a scoop of your favorite protein powder can boost nutrition and blend seamlessly into the oat mixture.
Why are my bars crumbly?
This usually happens if the sugar mixture wasn’t boiled long enough or if the layers weren’t pressed firmly. Make sure to follow the instructions closely.
Can I double the recipe?
Definitely! Just use a larger pan and adjust chilling time accordingly to ensure bars set completely.
Final Thoughts
Making these No Bake Chocolate Oatmeal Bars Recipe feels like wrapping yourself in a warm, delicious hug. With every bite, you get the perfect blend of chewy oats, rich chocolate, and creamy peanut butter that never fails to bring smiles. It’s a simple yet sensational way to satisfy a sweet craving without heating up your kitchen or waiting forever.
Have you tried this No Bake Chocolate Oatmeal Bars Recipe? I’d love to hear how it turned out! Leave a comment below. If you loved this recipe, please share it with friends and family. Happy cooking! 🍫✨
PrintNo Bake Chocolate Oatmeal Bars Recipe

Delicious and easy No Bake Chocolate Oatmeal Bars featuring a layered combination of buttery oats, silky chocolate, and peanut butter. Perfect for a quick treat that requires no oven and sets firmly in the refrigerator. These bars strike a balance of sweet, chewy, and chocolatey goodness, ideal for snack time or dessert.
- Prep Time: 15 minutes
- Cook Time: 10 minutes
- Total Time: 2 hours 25 minutes
- Yield: 16 servings 1x
- Category: Dessert
- Method: No-Cook
- Cuisine: American
- Diet: Vegetarian
Ingredients
Base and Layers
- 1 cup butter
- 1/2 cup brown sugar (packed)
- 1 teaspoon vanilla extract
- 3 cups rolled oats
Chocolate Peanut Butter Filling
- 1 cup semisweet or dark chocolate chips
- 1/2 cup peanut butter
Instructions
- Prepare the Pan: Line an 8-inch or 9-inch square baking dish with parchment paper, allowing some overhang on the edges to easily lift the bars out later. You may also use a 9×13-inch dish for thinner bars.
- Melt Butter and Sugar: In a large saucepan over medium heat, melt 1 cup butter with 1/2 cup packed brown sugar, stirring until the butter is fully melted and sugar dissolved. Stir in 1 teaspoon vanilla extract.
- Add Oats: Mix in 3 cups rolled oats and continue cooking on low heat for 3 to 4 minutes, stirring frequently until ingredients are well blended and slightly cooked.
- First Layer: Pour half of the oat mixture into the prepared baking dish. Spread it out evenly, using the back of a spoon or spatula to press down firmly to form the base layer.
- Prepare Chocolate-Peanut Butter Filling: In a small microwave-safe bowl, melt 1/2 cup peanut butter and 1 cup semisweet or dark chocolate chips together. Stir until smooth and fully combined.
- Add Chocolate Layer: Pour the chocolate-peanut butter mixture evenly over the oat base layer in the pan, reserving about 1/4 cup of the mixture for drizzling on top.
- Top Oat Layer: Pour the remaining oat mixture on top of the chocolate layer, spreading it evenly and pressing down gently to set the layer.
- Final Chocolate Drizzle: Drizzle the reserved chocolate-peanut butter mixture over the top oat layer for decoration and extra flavor.
- Chill: Refrigerate the assembled bars for 2 to 3 hours or preferably overnight until firm. Before serving, bring to room temperature for easier slicing.
- Texture Tip: The firmness of the bars depends on how long you cook the oat mixture with sugar; too short yields soft bars, too long can make them dry or crumbly.
Notes
- Use parchment paper with overhang for easy removal of bars from the pan.
- Adjust the chocolate to peanut butter ratio if you prefer a sweeter or nuttier flavor.
- For thinner bars, use a larger pan such as 9×13-inch.
- Let bars come to room temperature before cutting to avoid cracking.
- Cooking time of the sugar mixture influences the final texture of the bars, so monitor carefully.
Keywords: no bake bars, chocolate oatmeal bars, peanut butter bars, easy no bake dessert, refrigerator bars, chocolate peanut butter oatmeal