Red Velvet Poke Cake with Fudge Brownie Layer and Cream Cheese Topping Recipe
Picture this: the irresistible aroma of warm, rich red velvet mingling with luscious fudge filling your kitchen, while a velvety layer of cream cheese topping makes every bite feel like a cozy hug. The vibrant red cake peeking through a decadent fudge brownie layer, crowned with creamy whipped topping and drizzled with hot fudge, is pure comfort wrapped in elegance. Whether you are craving a crowd-pleaser for your next gathering or simply indulging in a home-baked treasure, this Red Velvet Poke Cake with Fudge Brownie Layer and Cream Cheese Topping Recipe is bound to become your new favorite dessert obsession.
Why You’ll Love This Red Velvet Poke Cake with Fudge Brownie Layer and Cream Cheese Topping Recipe
- Delightfully Decadent: Combines the rich flavors of red velvet and fudge brownie with a creamy topping for a mouthwatering experience.
- Perfectly Balanced Layers: The moist cake, gooey fudge, and fluffy cream cheese topping complement each other in every bite.
- Impress Your Guests: This cake looks stunning and tastes like it took hours to make—no one will believe it’s a simple bake!
- Generous Portions: Yields 15 servings, ideal for family gatherings, parties, or sharing with friends.
- Simple to Prepare: Uses boxed mixes and easy-to-find ingredients to deliver extraordinary flavor without fuss.
Why This Red Velvet Poke Cake with Fudge Brownie Layer and Cream Cheese Topping Recipe Works
This recipe works its magic by layering a moist red velvet cake base with a fudgy brownie topping, baking them together to create a harmonious texture contrast. The key trick is poking holes into the warm cake to soak up sweetened condensed milk, infusing each bite with luscious creaminess that keeps the cake unbelievably moist. The final cream cheese and Cool Whip topping adds a light yet rich finish, balancing the sweetness with tangy notes, making every forkful a delight that’s melt-in-your-mouth perfect.

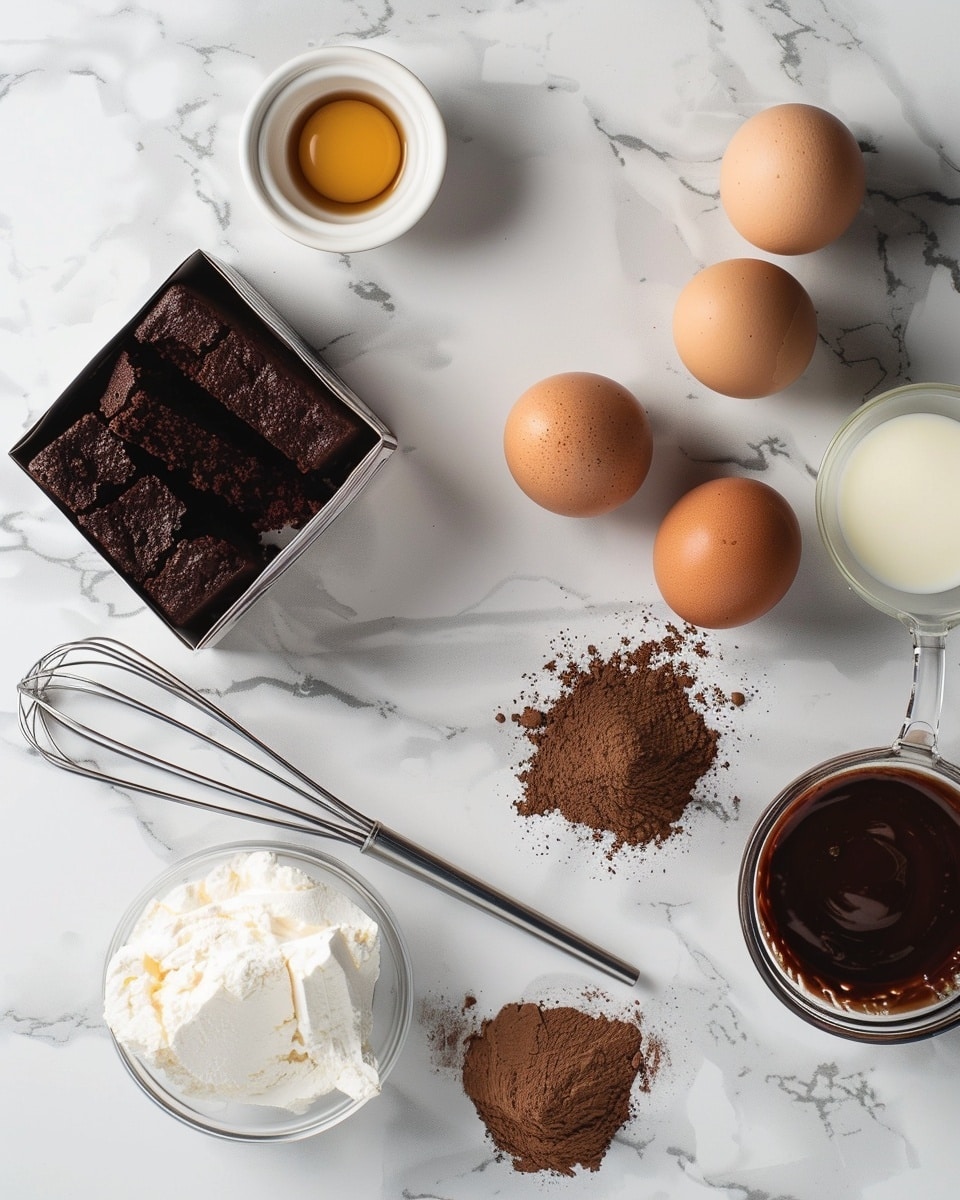
Ingredients You’ll Need
This Red Velvet Poke Cake with Fudge Brownie Layer and Cream Cheese Topping Recipe uses straightforward pantry staples that make baking fun and stress-free while producing an unforgettable dessert.
- Red velvet cake mix (15oz): Convenient base packed with classic flavors and the iconic red hue.
- Egg, oil, and water: Required to prepare the cake mix for tender crumb and moisture.
- Fudge brownie mix (18oz): Provides the rich, chocolaty topping that pairs perfectly with red velvet.
- Egg, oil, and water (for brownies): Used to create the fudgy brownie batter.
- Sweetened condensed milk (14 oz jar): Poured over the warm cake to soak into the holes for incredible moisture and sweetness.
- Cream cheese (8oz, room temperature): Adds tang and creaminess to the luscious topping.
- Cool Whip (8oz, thawed) or Homemade Whipped Cream: Lightens the cream cheese topping for a fluffy finish.
- Hot fudge: Drizzled on top for that extra indulgent touch.
Ingredient Substitutions & Tips
- Red velvet cake mix: For a homemade version, use cocoa powder with a bit of vinegar and red food coloring to replicate the classic flavor.
- Fudge brownie mix: Try any fudgy chocolate cake or brownie mix depending on your preference or brand availability.
- Sweetened condensed milk: Can substitute with coconut condensed milk for a dairy-free twist if needed.
- Cool Whip: Homemade whipped cream made from heavy cream works wonders to keep this topping fresh and natural.
👨🍳 Pro Tips for Perfect Results
- Use room temperature cream cheese: For smooth, lump-free topping, always ensure your cream cheese is soft before mixing.
- Don’t overmix the batter: Mix until combined to avoid dense cake texture.
- Poke evenly and gently: Use a wooden spoon handle to avoid tearing the cake when creating holes for the condensed milk.
- Cool completely before frosting: Prevent melting or sliding of the cream cheese topping by waiting till the cake is fully cooled.
- Chill before serving: Letting the cake rest in the fridge helps flavors meld beautifully and makes slicing easier.
How to Make Red Velvet Poke Cake with Fudge Brownie Layer and Cream Cheese Topping Recipe
Step 1: Preheat and Prepare the Red Velvet Cake Batter
Begin by preheating your oven to 350°F. In a large mixing bowl, combine the red velvet cake mix with the eggs, oil, and water as instructed on the box. Stir gently but thoroughly until the batter is smooth and velvety. Pour this luscious red velvet batter evenly into a 9×13-inch baking pan, creating the rich base layer for your cake.
💡 Pro Tip: Use a spatula to scrape down the sides of the bowl, ensuring no precious batter is left behind for the moistest cake possible.
Step 2: Prepare and Layer the Fudge Brownie Batter
Next, whip up your fudge brownie mix following the package instructions—typically combining the brownie mix with eggs, oil, and water. Once ready, carefully pour the brownie batter over the red velvet cake layer. Do this gently so the brownie mix sits on top, creating those glorious, contrasting layers that make this cake a masterpiece.
💡 Pro Tip: Try pouring the brownie batter slowly and evenly; this helps maintain distinct layers without mixing.
Step 3: Bake the Combined Cake Layers
Place your layered cake in the preheated oven and bake for 30-35 minutes. You’ll know it’s ready when the edges pull slightly away from the pan and a toothpick inserted near the center comes out with just a few moist crumbs attached. Remove from the oven and let it cool for at least 30 minutes to prepare for the next magical step.
💡 Pro Tip: Do not overbake; a slight underbake ensures the brownie layer stays wonderfully fudgy.
Step 4: Poke Holes and Pour Sweetened Condensed Milk
While the cake is still warm, grab the end of a wooden spoon or similar rounded utensil and poke holes evenly all over the top of your cake. These holes are crucial—they allow the sweetened condensed milk to seep deep, infusing moisture and incredible sweetness. Slowly pour the entire jar of sweetened condensed milk on top, letting it soak thoroughly as the cake cools completely.
💡 Pro Tip: Be gentle when poking so the cake structure stays intact but open enough for the milk to penetrate.
Step 5: Prepare the Cream Cheese Topping
While the cake finishes cooling, prepare the topping by combining the softened cream cheese and thawed Cool Whip (or homemade whipped cream) in a mixing bowl. Beat these together on medium speed until smooth, fluffy, and irresistibly creamy. This topping will provide the perfect tangy counterbalance to the rich, sweet cake beneath.
💡 Pro Tip: Beat the mixture well to avoid lumps and achieve an ultra-light texture.
Step 6: Frost and Garnish Your Cake
Once the cake is completely cool, spread the luscious cream cheese topping evenly over the surface. Finish with generous drizzles of hot fudge for a show-stopping presentation. Place the cake in the refrigerator immediately after frosting to set perfectly.
💡 Pro Tip: Use a spatula dipped in warm water to smooth the frosting effortlessly and create a glossy finish.
Common Mistakes to Avoid
Learn from these common pitfalls:
- Overmixing the batter: Can lead to tough, dense cake instead of moist and tender layers.
- Poking too few holes: Results in uneven condensed milk absorption, missing that luscious moisture.
- Pouring the brownie batter too fast: May mix it into the red velvet layer, blurring the beautiful contrast.
- Frosting warm cake: Causes melting and sliding of the cream cheese topping.
- Skipping refrigeration: The cream cheese layer needs to chill for best texture and flavor melding.
- Not softening cream cheese: Makes mixing difficult and leads to lumpy frosting.
Delicious Variations to Try
Once you’ve mastered this classic, why not tweak the recipe to suit your tastes? Here are some halal-friendly ideas to keep your baking adventure exciting:
White Chocolate Drizzle
Add a drizzle of melted white chocolate over the hot fudge for a sweet, creamy twist that pairs beautifully with the red velvet.
Nutty Crunch
Sprinkle chopped toasted pistachios or almonds atop the cream cheese layer for a delightful texture contrast and nutty flavor.
Berry Infusion
Mix fresh or frozen raspberries into the cream cheese topping for a tangy burst and vibrant color that complements the rich cake.
Coconut Dream
Fold shredded coconut into the whipped cream topping for a tropical flair that adds both flavor and chewiness.
Caramel Swirl
Swap out the hot fudge drizzle for a salted caramel sauce to introduce a silky, buttery complexity that will wow your guests.
How to Serve Red Velvet Poke Cake with Fudge Brownie Layer and Cream Cheese Topping Recipe
Garnishes
Fresh raspberries, delicate chocolate shavings, or a light dusting of cocoa powder add an elegant finish and extra flavor pop.
Side Dishes
Serve alongside a scoop of vanilla bean or coffee ice cream, or a simple cup of freshly brewed coffee or hot tea to complement the cake’s rich layers.
Creative Ways to Present
Slice the cake into squares and serve on chilled dessert plates with a fork elegantly drizzled with extra hot fudge or berry coulis. For parties, consider serving mini versions in ramekins topped with whipped cream swirls.
Make Ahead and Storage
Storing Leftovers
Refrigerate this cake tightly covered with plastic wrap or in an airtight container. It stays fresh for up to 5 days, allowing the flavors to deepen and the cake to stay moist.
Freezing
Wrap cake slices individually in plastic wrap and foil to freeze for up to 2 months. Thaw in the refrigerator overnight before serving to maintain texture and taste.
Reheating
This cake is best served chilled or at room temperature. If desired, allow refrigerated slices to sit out for 15-20 minutes before serving. Avoid microwaving to preserve the texture of the cream cheese topping.
FAQs
Can I use homemade red velvet and brownie batter instead of mixes?
Absolutely! Homemade versions work beautifully and allow you to customize sweetness and texture, though boxed mixes offer convenience and consistent results.
Is it possible to make this recipe dairy-free or vegan?
You can substitute dairy ingredients with plant-based alternatives such as vegan cream cheese and coconut whipped topping, and explore dairy-free sweetened condensed milk options to keep it vegan-friendly.
Why do I poke holes in the cake?
Poking holes lets the sweetened condensed milk soak deep into the cake, ensuring every bite is moist and infused with luscious sweetness.
Can I prepare the cake in advance?
Yes! Baking the cake a day ahead and assembling the topping before serving improves flavor melding. Just refrigerate after frosting.
What if my brownie layer doesn’t cook through?
If the brownie feels undercooked after baking, give it a few more minutes in the oven, but be careful not to overdry the red velvet base.
Can I use regular whipped cream instead of Cool Whip?
Definitely! Homemade whipped cream thickened with a bit of powdered sugar works wonderfully for a natural, fluffy topping.
Is this recipe suitable for large gatherings?
Yes, this recipe yields 15 servings, perfect for parties. You can double the ingredients for bigger batches.
How long should I refrigerate the cake after frosting?
Chilling the cake for at least 2 hours helps the cream cheese topping set perfectly and makes slicing neater.
Final Thoughts
Baking this Red Velvet Poke Cake with Fudge Brownie Layer and Cream Cheese Topping Recipe feels like sharing a treasured secret with loved ones. It’s a feast for the senses, blending luxurious layers with a heavenly cream cheese finish that spells comfort and celebration in every bite. Whether it’s a special occasion or a treat-yourself day, this cake promises smiles, happiness, and maybe a few “wow” moments around the table.
Have you tried this Red Velvet Poke Cake with Fudge Brownie Layer and Cream Cheese Topping Recipe? I’d love to hear how it turned out! Leave a comment below. If you loved this recipe, please share it with friends and family. Happy cooking! 🍰
PrintRed Velvet Poke Cake with Fudge Brownie Layer and Cream Cheese Topping Recipe

This Red Velvet Poke Cake is a decadent layered dessert combining moist red velvet cake and rich fudge brownie. The cake is baked in one pan with brownie batter layered on top, then poked while warm to soak in sweetened condensed milk for ultimate moistness. Topped with a luscious cream cheese and whipped topping and finished with hot fudge, this crowd-pleaser is perfect for celebrations or any sweet craving.
- Prep Time: 10 minutes
- Cook Time: 35 minutes
- Total Time: 45 minutes plus cooling time
- Yield: 15 servings 1x
- Category: Dessert
- Method: Baking
- Cuisine: American
Ingredients
Red Velvet Cake
- 1 box (15 oz) red velvet cake mix (plus ingredients listed on the box: eggs, oil, water)
Fudge Brownie Layer
- 1 box (18 oz) fudge brownie mix (plus ingredients listed on the box: eggs, oil, water)
Toppings and Garnishes
- 1 jar (14 oz) sweetened condensed milk
- 1 package (8 oz) cream cheese, at room temperature
- 1 container (8 oz) Cool Whip, thawed (or homemade whipped cream)
- Hot fudge sauce, for garnish
Instructions
- Preheat Oven: Preheat your oven to 350°F (175°C) to get it ready for baking the layered cake.
- Prepare Red Velvet Batter: In a mixing bowl, combine the red velvet cake mix with the required ingredients listed on the box (typically eggs, oil, and water). Mix thoroughly until the batter is smooth and well combined. Pour the batter evenly into a 9×13-inch baking pan.
- Prepare Brownie Batter: In a separate bowl, mix the fudge brownie mix with its required ingredients per the box instructions (usually eggs, oil, water). Stir until fully combined. Carefully pour the brownie batter on top of the red velvet batter in the baking pan, spreading gently to cover evenly.
- Bake the Cake Layers: Place the pan in the preheated oven and bake for 30 to 35 minutes, until a toothpick inserted into the cake layer comes out mostly clean. Remove from the oven and allow the cake to cool for at least 30 minutes.
- Poke Holes in Cake: While the cake is still warm, use the end of a wooden spoon or a similar round tool to poke holes all over the surface of the cake. This step allows the sweetened condensed milk to soak deeply into the cake layers.
- Add Sweetened Condensed Milk: Pour the entire jar of sweetened condensed milk evenly over the top of the cake, letting it absorb into the cake through the holes. Allow the cake to cool completely to room temperature and set.
- Make Cream Cheese Topping: In a mixing bowl, beat the room temperature cream cheese together with the thawed Cool Whip (or homemade whipped cream) on medium speed until smooth and fully combined. Spread this creamy topping evenly over the completely cooled cake surface.
- Garnish and Refrigerate: Drizzle hot fudge sauce over the top of the cream cheese topping for garnish. After assembling, refrigerate the cake to firm up the topping and enhance flavor blending before serving.
Notes
- Make sure the cake is completely cooled before spreading the cream cheese topping to prevent it from melting.
- You can substitute Cool Whip with homemade whipped cream for a fresher taste.
- Letting the cake sit in the fridge for a few hours or overnight improves the flavor and texture as it allows the milk to fully soak in.
- Use room temperature cream cheese to ensure a smooth, lump-free topping.
- This recipe yields generous portions suitable for parties or large gatherings.
Keywords: Red Velvet Poke Cake, layered dessert, poke cake, red velvet cake, fudge brownie, cream cheese topping, moist cake